Ever wondered how to make the most of a small kitchen without sacrificing style or functionality? Small kitchen design ideas have gained immense popularity because they prove that even compact spaces can be both beautiful and efficient. Clever layouts, smart storage solutions, and eye-catching details turn tiny kitchens into inspiring culinary hubs.
This article is packed with a variety of ideas to help you maximize your space and reflect your personal style. Whether you’re into minimalist chic, cozy farmhouse, or modern elegance, you’ll find practical tips and creative concepts that can transform your kitchen into a stunning, functional area you’ll love spending time in.
1. Maximize Vertical Storage with Open Shelving
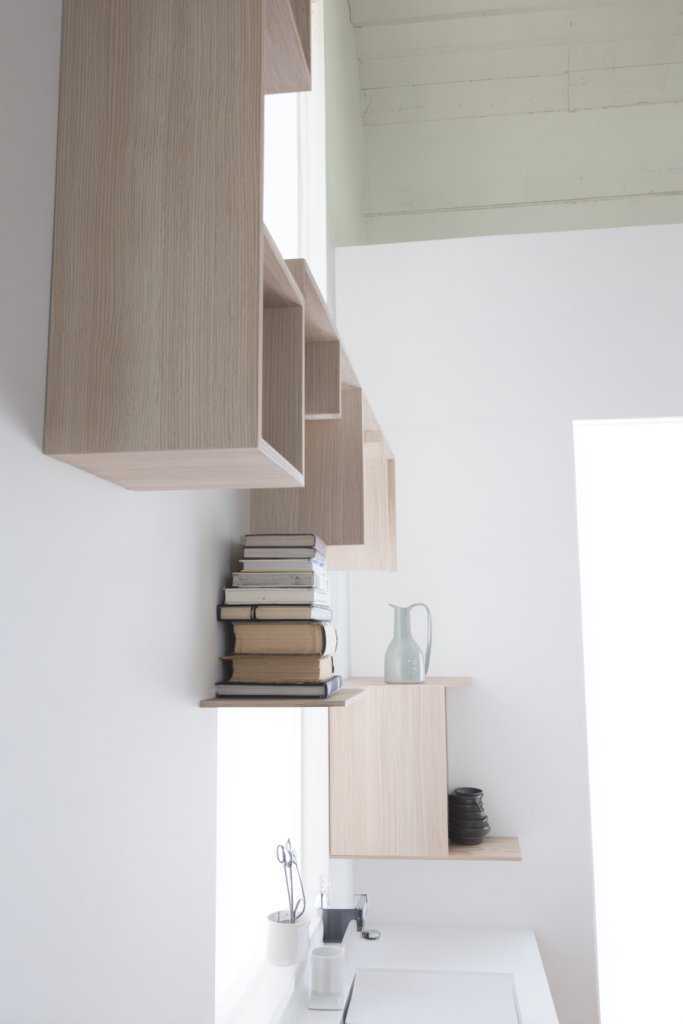
Ever feel like your small kitchen is bursting at the seams, but you just can’t quite figure out how to fit everything? Vertical storage with open shelving is the secret weapon for those who want to free up precious counter space while keeping essentials within reach. It’s like turning a cluttered closet into an effortlessly organized display. Plus, it adds a dash of personality to your kitchen without much effort.
Imagine sleek, floating wooden shelves mounted high on the wall, filled with colorful dishware, glass jars, and quirky mugs. The open design allows light to bounce around, making the space feel airier. The textures of the wood contrast beautifully with shiny ceramic plates and metal utensils, creating a layered visual interest. You can almost hear the clink of dishes and the aroma of fresh herbs stored nearby.
Open shelving can adapt to any style — from rustic farmhouse with distressed wood to minimal Scandinavian with clean lines. For a seasonal twist, swap out decor items like cozy knit hats or decorative bowls. In smaller kitchens, use vertical space above the fridge or oven for extra height. Even in industrial spaces, pairing metal brackets with reclaimed wood offers a trendy vibe.
Start by measuring your wall space to determine the number and length of shelves needed. Choose durable materials like solid wood or metal brackets for load-bearing capacity. Install anchors into studs if possible, for safety when holding heavier items. Arrange your dishes and accessories in a way that balances aesthetics and accessibility, grouping similar items together. Keep frequently used items at eye level for convenience. Regularly dust and organize to prevent dust build-up.
Add decorative touches like vintage jars, colorful spice canisters, or small potted herbs (if you ignore restrictions) that don’t clutter the space. Incorporate floating shelves with different depths for visual interest. Use baskets or fabric bins on the shelves for hidden storage of less attractive items. Personalize with a few statement pieces, like a sculptural bowl or a textured ceramic plate.
Vertical open shelving transforms a cramped kitchen into a functional showcase, making everyday cooking feel more inspiring. It encourages smarter organization and easy access. Once installed, you’ll wonder how you ever managed without it. Ready to elevate your kitchen’s style and efficiency?
2. Incorporate Multi-Functional Furniture Pieces
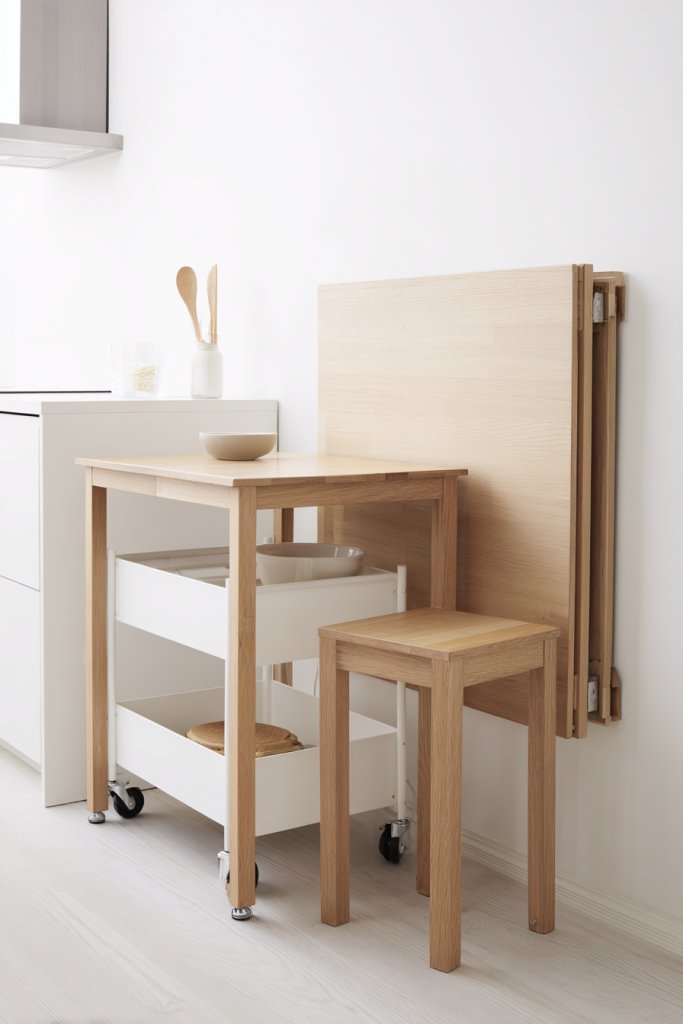
Small kitchens often feel like they’re fighting for every inch of space, leaving you overwhelmed and short on prep or storage options. Multi-functional furniture offers a clever way to kill two birds with one stone — more functionality without sacrificing floor space. It’s the ultimate hack for living large in tiny spaces.
Picture a compact table that folds down against the wall, revealing a clean surface when needed, then tucks away to free up space. Or a stool that doubles as storage, with a removable seat revealing a hidden compartment. Imagine a sleek, minimal cart that can serve as a prep station, a mobile storage unit, or even a makeshift dining table. These pieces blend form and function seamlessly.
Choose furniture that matches your style — from Scandinavian’s light wood simplicity to industrial metal accents. For a more casual look, opt for stackable stools or foldable tables that tuck into a corner. Adapt to your needs: a fold-away counter can act as a breakfast bar or extra prep space during parties. Larger carts can serve as a mobile pantry or serving station for entertaining.
Start by prioritizing your most pressing needs — extra surface area, storage, or seating. Select furniture that’s lightweight but sturdy, easy to fold or move around. Install wall-mounted fold-down tables using sturdy hinges and support brackets. For multi-purpose stools or carts, ensure they can handle daily use and weight. Use adjustable or modular pieces to customize your setup. Regularly clean and check hinges or wheels for smooth operation.
Customize with colorful cushions, patterned fabrics, or label storage compartments for quick identification. Add a removable tray or cutting board for versatility. Use decorative wraps or paint to match your decor theme. Consider integrating hooks or small baskets on carts for utensils or small tools.
Multi-functional furniture turns limited space into a flexible, stylish zone that adapts as your needs change. It’s proof that clever design beats size every time. Once you get the hang of it, you’ll wonder how you ever managed in that tiny kitchen.
3. Use Light, Reflective Bittings to Enhance Brightness
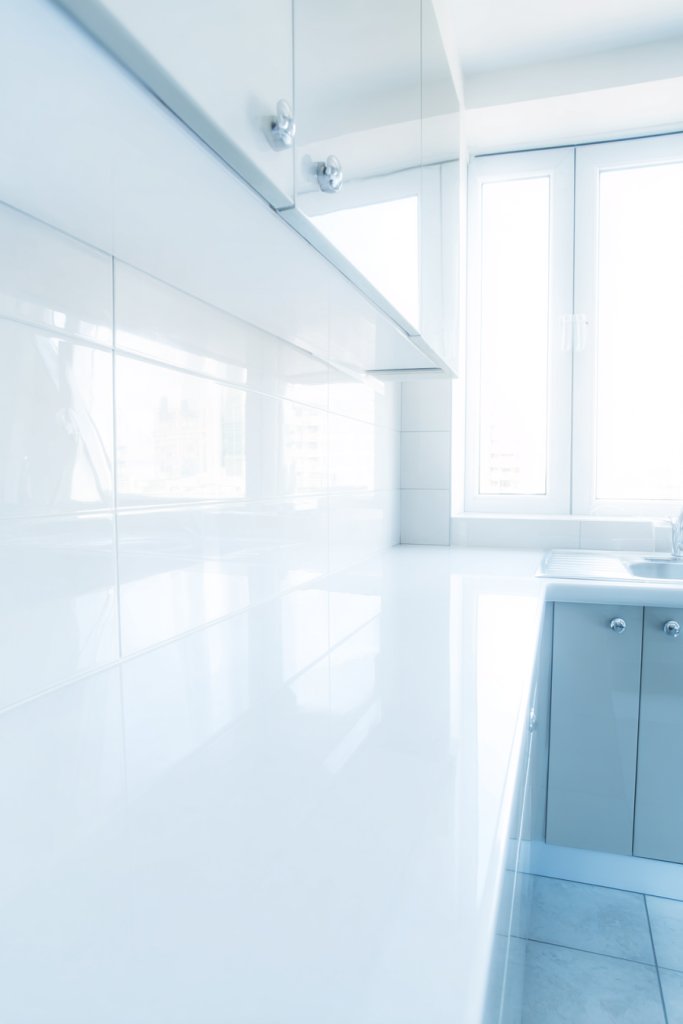
Does your small kitchen feel gloomy, especially on cloudy days or after sunset? Brightening up a cramped space isn’t just about adding more lights — it’s about making everything reflect and bounce light around. Light, reflective surfaces can make your kitchen feel twice as big and inviting.
Imagine glossy white cabinets that gleam under under-cabinet LED strips, bouncing light onto the countertop. Glass-front cabinets add a sense of depth and transparency, making the space appear open. A shiny backsplash made of reflective tiles or metallic finishes creates a shimmering effect that amplifies ambient light. Soft, reflective countertop materials like quartz or polished concrete further enhance the brightness.
Opt for high-gloss finishes in modern or minimalist kitchens for a sleek, airy feel. Use reflective backsplashes with subtle textures or metallic tones to add interest without overwhelming the space. In rustic or vintage kitchens, consider distressed or matte finishes, but keep the overall palette light for brightness. Incorporate mirrored accents sparingly to avoid overwhelming the senses.
Choose reflective materials like glass, glossy paint, or metallic tiles for cabinets, backsplashes, and countertops. Install under-cabinet lighting to maximize light bounce and illuminate work areas. Use light-colored or metallic hardware, such as brushed nickel or chrome, to reflect more light. Keep walls and ceilings painted in light hues, ideally white or soft pastels. Regular cleaning of reflective surfaces keeps them shiny and effective.
Add subtle textured finishes or matte accents to balance the shine and prevent glare. Incorporate decorative elements like metallic utensil racks or reflective storage jars for a cohesive look. Use light-colored textiles and accessories to complement the reflective surfaces. Personal touches like a soft cream throw blanket with chunky knit texture can add warmth without detracting from brightness.
Bright, reflective surfaces will elevate your kitchen’s vibe, making it feel more spacious and cheerful. It’s an easy way to boost mood and functionality with minimal effort. Once you see the difference, you’ll wonder why you didn’t do it sooner.
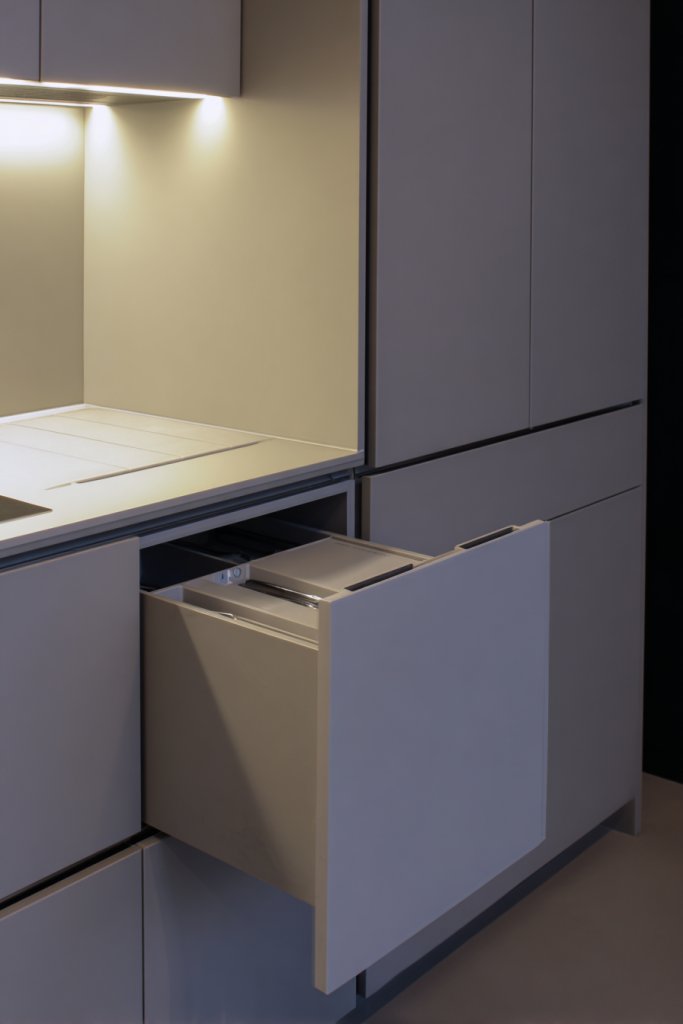
4. Install Slim, Pull-Out Pantry Cabinets
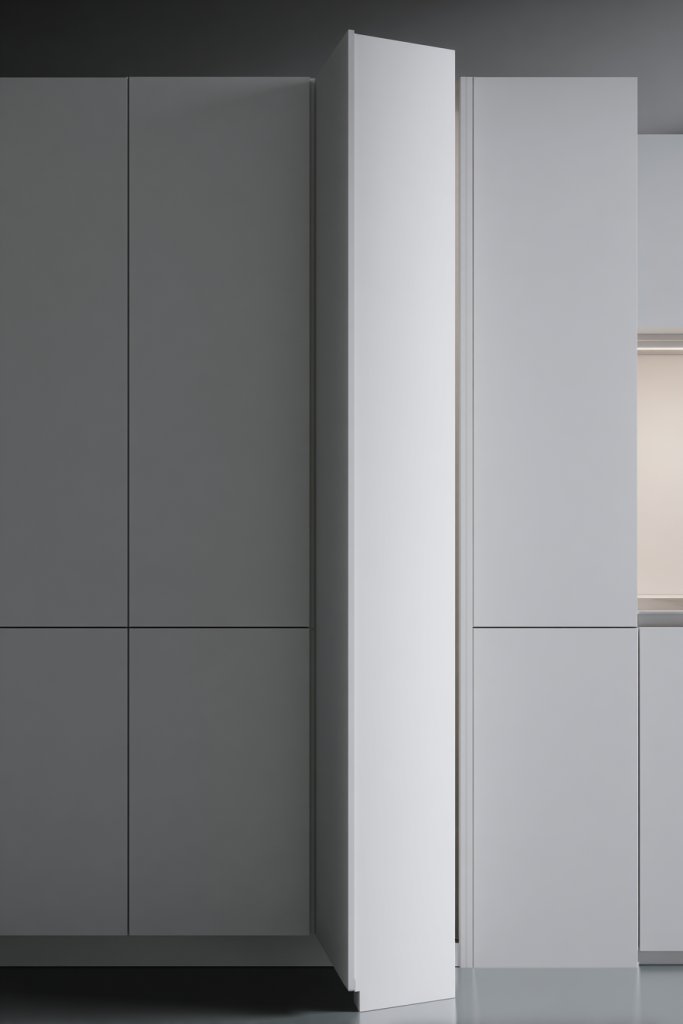
Ever wish you had more storage but your kitchen is just too narrow for traditional pantry setups? Slim, pull-out pantry cabinets are the perfect solution to squeeze maximum storage into tight spots. They hide clutter and keep everything organized without taking up valuable floor space.
Picture a tall, slender cabinet that seamlessly slides out, revealing multiple shelves of neatly arranged canned goods, spices, and snacks. The sleek design disappears when not in use, maintaining a clean look. When opened, it’s like a mini warehouse right inside your kitchen wall. The pull-out mechanism ensures easy access without disturbing neighboring cabinets.
Choose finishes that match your existing cabinetry for a seamless look. Use adjustable shelves inside for different item sizes. For a more modern feel, opt for matte or glossy surfaces, or even a mirrored front to visually expand the space. This setup works well in both traditional and contemporary kitchens. You can also customize the depth to fit specific items.
Measure the available space carefully, considering door clearance and cabinet height. Select a pull-out system that can support your storage needs, focusing on smooth operation and durability. Install the cabinet frame securely into wall studs and add adjustable shelves inside for flexibility. Use organizers or baskets to keep smaller items tidy. Regularly check for smooth sliding action and clean tracks to prevent jamming.
Personalize with labeled baskets for quick identification or color-coded bins for different categories. Use door-mounted hooks or small racks for utensils or cleaning supplies. Incorporate soft-close mechanisms for a quieter experience. The sleek look can be jazzed up with custom paint or hardware that matches your decor.
Slim pull-out pantries turn wasted wall space into valuable storage. They keep your kitchen looking tidy and make cooking more efficient. Once installed, they’ll become your go-to for organized convenience.
5. Opt for Under-Cabinet Lighting for Ambiance and Function

Small kitchens often suffer from poor lighting, making tasks harder and the space less inviting. Under-cabinet lighting is a simple upgrade that brightens your workspace and adds a cozy ambiance. It transforms your kitchen into a warm, welcoming hub, perfect for cooking or casual gatherings.
Imagine soft LED strips glowing beneath your upper cabinets, casting a gentle light on your countertops. The light accentuates textures and colors, making everything look vibrant. The glow creates a layered lighting effect, replacing harsh overhead lights with soothing illumination. It’s like turning on a gentle nightlight during evening prep.
Choose from different lighting types — warm white for cozy vibes, cool white for task clarity, or color-changing LEDs for fun. Install dimmers to control brightness levels according to mood or activity. For a sleek look, hide the strips inside the cabinet or use minimal fixtures for a seamless appearance. This setup adapts well to any decor style, from rustic to modern.
Select high-quality LED strips with adhesive backing for easy installation. Measure the length needed and cut strips to size if necessary. Use connectors or soldering for clean, continuous lighting. Mount the strips underneath the cabinets, ensuring they’re secure and evenly spaced. Power sources can be plugged into nearby outlets or wired directly into your electrical system for a cleaner look. Test for even lighting and adjust as needed.
Add color-changing options or smart controls for remote operation. Incorporate motion sensors for automatic lighting when you enter the kitchen. Use dimmable fixtures to set the perfect mood. Consider pairing with decorative textiles or textured cabinet doors to complement the glow.
Under-cabinet lighting elevates both the style and practicality of your small kitchen. It’s an inexpensive way to make your space feel more open and inviting. Once you see how much brighter and cozier it becomes, you won’t want to go back.
6. Create a Compact but Efficient Island or C countertop

Limited kitchen space often makes it tricky to add an island or extra prep area without cluttering the floor. A compact, mobile island or cart offers the perfect compromise — extra surface and storage that can be moved out of the way. It’s the best way to boost functionality without sacrificing flow.
Picture a small rolling cart with a butcher block top, tucked into a corner when not in use. When needed, it rolls out to serve as an extra prep station or breakfast bar. Its open shelves hold pots, pans, or cookbooks, adding both storage and style. The clean lines and natural wood texture lend a warm, inviting feeling that fits any decor.
Choose styles that match your aesthetic — from sleek stainless steel for modern kitchens to rustic wood for farmhouse vibes. Use multi-tiered carts for maximum storage or a foldable top for flexibility. For small spaces, opt for narrow, slim profiles that slide easily into tight corners. Multi-use options like a serving station or craft table make it even more versatile.
Select a durable, lightweight material like bamboo, stainless steel, or painted wood. Ensure the cart has sturdy wheels with locks for stability. Assemble according to the manufacturer’s instructions, checking weight limits on shelves. Position the island where it provides the most convenience without blocking pathways. Regularly clean and lubricate wheels for smooth mobility. Consider adding hooks or small baskets for utensils and accessories.
Personalize with a colorful or patterned top, or add decorative handles for a touch of flair. Use baskets or bins underneath for extra storage. Incorporate a small fold-out cutting board or tray for added prep space. Choose a finish that complements your overall kitchen palette.
A small, mobile island can drastically improve your kitchen’s efficiency while maintaining a clutter-free look. It’s a smart investment for anyone wanting more prep space without a full remodel. Once you see how it simplifies your routines, you’ll wonder how you ever managed without it.
7. Use Light Color Palettes to Make the Space Feel Larger
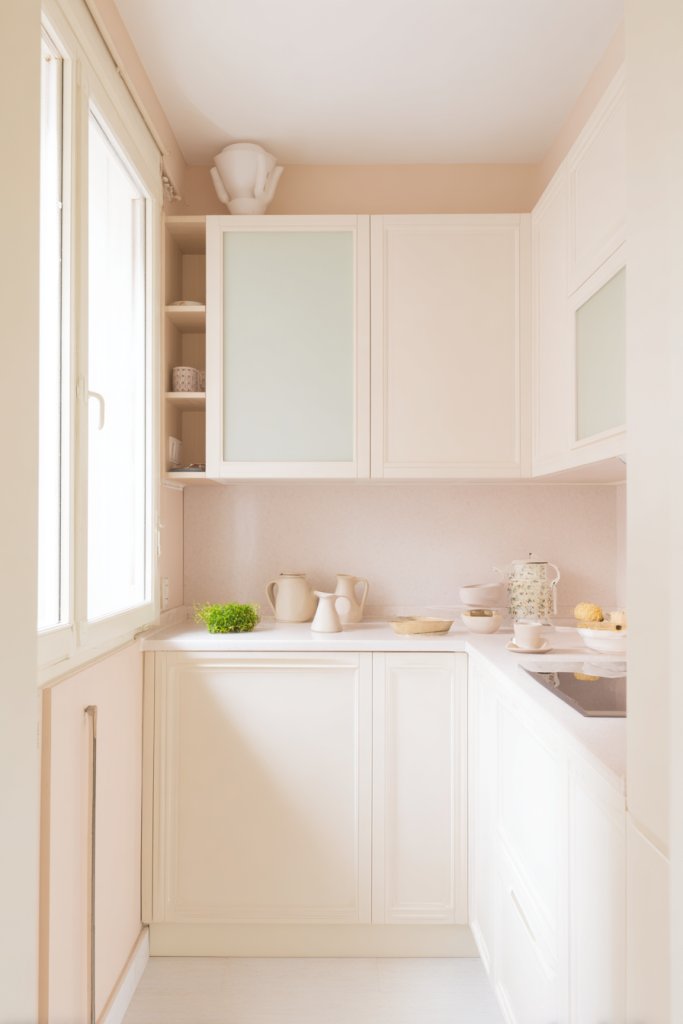
Does your small kitchen feel cramped and dark, even on sunny days? Using a light color palette can instantly open up the space and make it feel more airy and inviting. It’s like giving your tiny kitchen a fresh coat of confidence that visually enlarges the room.
Visualize white or pastel cabinets paired with a matching or subtly contrasting wall color. The soft tones reflect light and create a sense of openness. Add light-colored countertops like quartz or marble to enhance this effect. The overall effect is a serene, spacious feel that’s perfect for small kitchens craving a breath of fresh air.
Opt for monochromatic schemes for a seamless, expansive look. Use different shades of whites, creams, or light grays to add depth without overwhelming. For a cozy feel, incorporate textured textiles or layered curtains in light hues. Seasonal updates can include softer pastel accents or warm neutrals for a more inviting vibe.
Paint walls and cabinets in light shades, ensuring finishes are matte or eggshell to minimize glare. Choose light-reflective surfaces for countertops and backsplashes. Use minimal contrasting hardware or decorative elements to keep the palette cohesive. Maximize natural light through window treatments that don’t block sunlight. Keep clutter to a minimum to preserve the clean, open aesthetic.
Introduce textured textiles like a soft cream throw blanket or linen towels. Use subtle color pops in small accessories, like a pastel dishcloth or a light-toned utensil holder. Horizontal stripes or subtle patterns in light fabrics can add visual interest without breaking the sense of openness. Keep decorative accents minimal and in light shades.
A light color palette transforms your small kitchen into a calming oasis that feels twice its size. It boosts brightness and mood, making every meal prep feel more delightful. It’s a simple yet powerful way to upgrade your space’s look and feel.
8. Incorporate Hidden Storage Solutions
Clutter is the enemy of small kitchens, turning tidy into chaos in seconds. Hidden storage solutions are your secret weapon to keep things out of sight but within arm’s reach. They help maintain a sleek, streamlined look that makes your space appear larger and more organized.
Imagine toe-kick drawers tucked beneath cabinets, perfectly concealing utensils or cleaning supplies. Recessed cabinets behind the stove or sink hide everyday essentials, freeing up counter space. Small appliance garages with roll-up doors keep mixers and blenders out of sight. These clever tricks create a minimalist aesthetic with maximum utility.
Use toe-kick drawers for seldom-used or bulky items like baking sheets or small appliances. Recessed or built-in cabinets can be customized to fit your needs. Appliance garages can be painted or finished to match cabinetry, blending seamlessly. For a vintage look, opt for hidden compartments behind classic panels or decorative doors.
Identify clutter hotspots and measure available space. Install toe-kick drawers with sturdy slides, ensuring they can handle weight. Recessed cabinets require precise framing and secure mounting. Use organizers inside drawers for small items. Use magnetic or latch closures for a clean appearance. Regularly declutter and maintain to keep everything accessible.
Add labels or color-coded bins inside hidden compartments for quick identification. Incorporate soft-close mechanisms for a quiet, smooth operation. Match hardware and finishes to existing cabinetry for a cohesive look. Consider adding a small decorative element on hidden doors for charm.
Hidden storage solutions keep your small kitchen tidy and stylish, proving that less visible clutter means more space. They help you stay organized effortlessly and elevate your kitchen’s overall appeal. Once implemented, you’ll wonder how you ever lived without them.
9. Install Slimline Appliances to Save Space

Large appliances can dominate a small kitchen, making it feel cramped and overwhelming. Slimline appliances are the perfect fix, offering full functionality in a compact form. They free up precious space without sacrificing performance, making your kitchen both efficient and stylish.
Visualize a narrow refrigerator that fits snugly between cabinets or a slim dishwasher that tucks behind a narrow door. These appliances look sleek and modern, blending seamlessly into your cabinetry. Even a compact oven or microwave can make a huge difference, leaving room for prep and movement. The overall effect is a clutter-free, sophisticated space.
Choose stainless steel or matte finishes for a contemporary look. For a vintage vibe, opt for retro-inspired slim appliances with colorful accents. Use multi-purpose units that combine functions, like a combo microwave and convection oven. Install appliances at ergonomic heights for ease of use, especially in compact layouts.
Measure your space carefully to select appropriately sized appliances. Prioritize essential functions and look for energy-efficient models. Install built-in units flush with cabinetry for a streamlined appearance. Use custom panels to match surrounding cabinetry for a seamless look. Regularly clean and maintain to keep appliances in top shape.
Add decorative trims or custom panels to match your decor. Incorporate smart features like Wi-Fi controls or touchscreens for convenience. Use drawer-style fridges or freezers for accessible storage. Personalize with colorful or patterned door fronts for a playful touch.
Slimline appliances prove that size doesn’t have to compromise function. They help your small kitchen feel open and modern while delivering all the essentials. Once you adapt, you’ll wonder how you ever managed with bulky, space-hogging units.
10. Add a Wall-Mounted Fold-Down Table for Dining or Prep
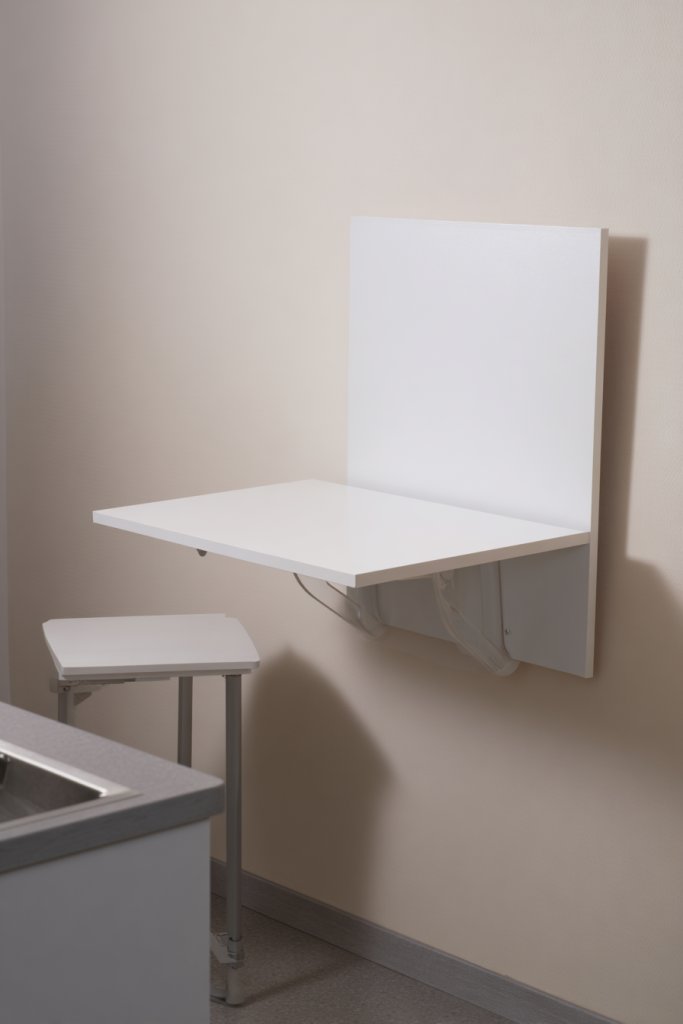
Limited space often means sacrificing dining or extra prep surfaces. A wall-mounted fold-down table solves this dilemma, providing a functional area that can disappear when not in use. It’s your secret weapon for maximizing every inch of your tiny kitchen.
Imagine a sleek, minimalist table attached to the wall with sturdy hinges. When folded down, it offers a comfortable spot for two or three people to eat or for chopping vegetables. When folded up, it’s virtually invisible, freeing up space for movement. A few decorative hooks or small shelves nearby complete the look.
Choose materials that match your decor — from rustic wood for farmhouse charm to sleek laminate for modern aesthetics. Use a fold-down table with integrated storage underneath for utensils or condiments. For a more playful look, opt for colorful or patterned finishes. Adjust the size based on your typical needs.
Securely install heavy-duty hinges into wall studs to support weight. Use a level to ensure proper alignment. Consider adding a fold-out support arm for stability. Keep the surface easy to clean and resistant to moisture. When not in use, simply fold it up against the wall.
Personalize with decorative edge trims or painted finishes. Add hooks or small magnetic strips nearby for utensils and tools. Incorporate a small, fold-out shelf or organizer beneath for extra storage. Match the table surface to your overall kitchen decor.
A fold-down table maximizes utility without cluttering your small kitchen. It’s a smart, stylish solution that makes every inch count. Once installed, it becomes a favorite feature for quick meals or extra prep space.
11. Use Clear or Light-Colored Containers for Pantry Organization

Cluttered pantries make cooking stressful and storage inefficient. Clear or light-colored containers help you see everything at a glance, keeping your small kitchen organized and visually spacious. They’re the secret to a neat, inspiring cooking environment.
Picture uniform jars filled with pasta, rice, and spices lined up on open shelves or inside cabinets. The transparent design allows you to quickly identify contents, reducing clutter and chaos. Light-colored containers in pastel or neutral tones blend beautifully with any decor, creating a calm, cohesive look. The uniformity adds a sense of order and cleanliness.
Choose airtight jars with matching lids for a streamlined appearance. Use categories—baking, snacks, cereals—for easy access. Incorporate small labels or tags for quick identification, or go label-free for a minimalist look. Mix and match sizes to fit different items and maximize space.
Select high-quality, BPA-free containers that are stackable and easy to clean. Clean and dry all items before filling to prevent mold or spoilage. Organize your pantry by frequency of use, placing staples in front. Regularly declutter and discard expired goods. Use a consistent system for stacking and storing for maximum efficiency.
Decorate containers with custom labels, stickers, or chalkboard tags for a personalized touch. Use color schemes to differentiate categories or simply keep it monochrome. Incorporate decorative trays or baskets to group similar items. Keep the setup simple, functional, and easy to maintain.
Clear containers turn a chaotic pantry into a showcase of order, making cooking more enjoyable. They save time and reduce waste, as you always know what you have. Once organized, your small kitchen will feel calmer and more inviting.
12. Incorporate Magnetic Strips for Knife and Tool Storage
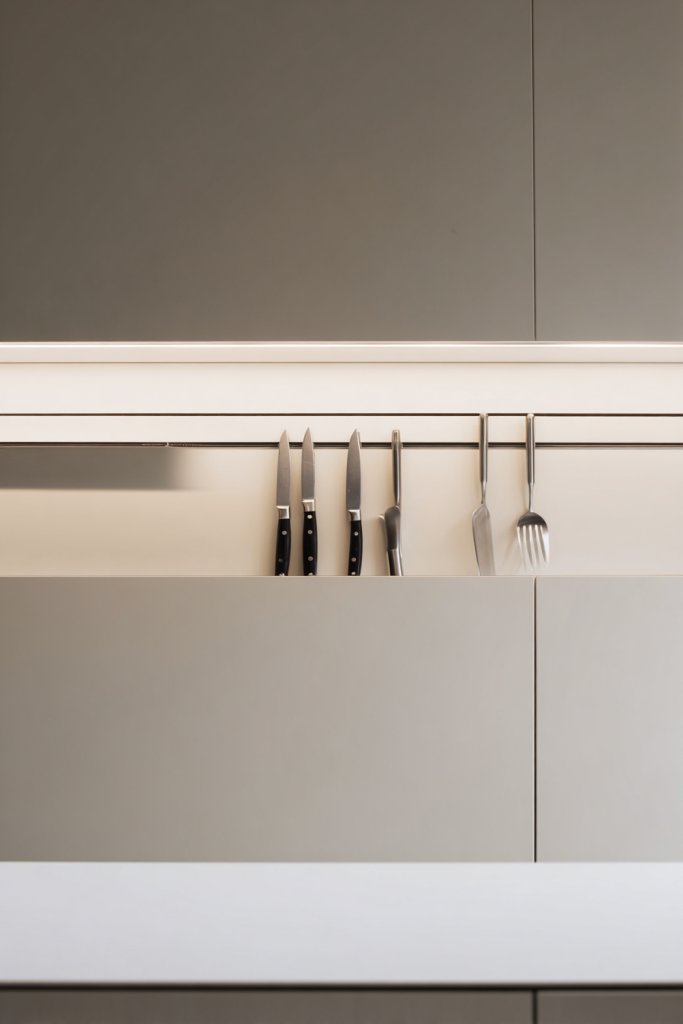
Counter clutter from knives, spatulas, and small tools can turn your tiny kitchen into a safety hazard. Magnetic strips offer a safe, space-saving method to organize these essentials. Plus, they keep your tools within easy reach, making cooking more efficient.
Visualize a sleek metal strip mounted on the wall near the stove, holding knives and metallic utensils like spoons and whisks. The tools hang neatly, their handles visible and accessible. The reflective surface adds a modern touch, and the organized look instantly clears clutter from your countertop. It’s a simple fix with a big impact.
Choose magnetic strips in finishes that match your decor — brushed steel, black, or colorful powder coat. Install near your prep or cooking area for maximum convenience. Use smaller magnetic containers for spice jars or small metal tools. This idea works well in industrial, minimalist, or contemporary kitchens.
Measure the length needed and select a sturdy, high-quality magnetic strip. Mount it securely into studs or wall anchors to support weight. Organize your tools by size or frequency of use. Regularly check for magnet strength and clean the strip to remove dust or debris. Consider adding labels or small hooks for extra organization.
Decorate the strip with colorful handles or add small decorative magnets for fun. Use magnetic containers for spices or small utensils, freeing up drawer space. Keep frequently used tools clean and sharp for safety. Coordinate with your overall kitchen color scheme for a cohesive look.
Magnetic strips turn a cluttered drawer or countertop into a sleek, organized feature. They make cooking safer and more enjoyable by keeping tools in sight. Once you see how much easier your prep becomes, you’ll wonder why you didn’t do it sooner.
13. Create a Corner Carousel or Lazy Susan
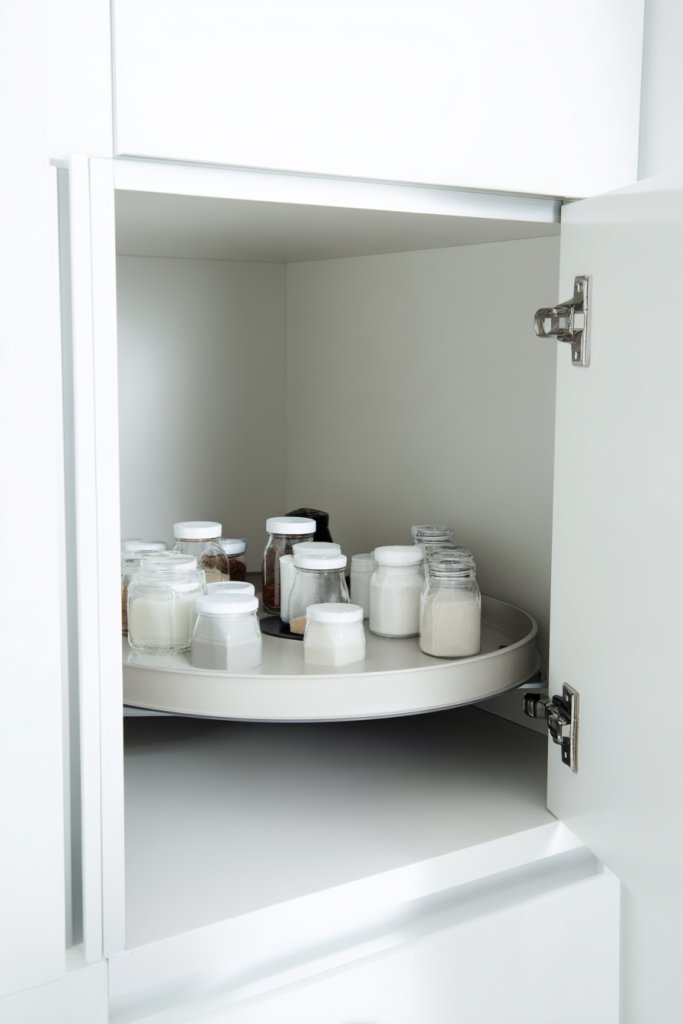
Corner cabinets often become black holes where items go to hide forever. A corner carousel or lazy Susan turns this wasted space into an accessible storage goldmine. It’s a game-changer for small kitchens that want maximum storage with minimal effort.
Imagine a sturdy, rotating shelf filled with jars of spices, cooking oils, or canned goods. As you spin it, everything is perfectly visible and reachable without crawling or digging. The smooth rotation makes grabbing ingredients quick and effortless. It’s like having a personal assistant right in your cabinet.
Choose between full-circle or half-circle designs based on your cabinet size. Use adjustable shelves within for different item heights. For a sleek look, opt for glass or matte finishes that match your cabinetry. This setup works well in traditional, modern, or rustic kitchens, depending on your choice of materials.
Measure the corner space carefully, ensuring enough clearance for rotation. Install the base securely into the cabinet frame, following the manufacturer’s instructions. Use adjustable or removable shelves for flexibility. Fill with frequently used items first, then organize less-used items around them. Regularly clean and check for smooth operation.
Label sections or use color-coded jars to find what you need faster. Add decorative liners or small baskets inside for added organization. Keep it visually appealing with coordinated colors or textures. Integrate lighting if possible to illuminate contents.
A corner carousel maximizes awkward space and keeps everything visible at a glance. It turns a dull corner into a functional feature that simplifies your routines. Once you see how easy access becomes, you’ll wonder how you managed before.
14. Hang Pots, Pans, and Utensils with Overhead Racks

Cluttering your cabinet or countertop with pots, pans, and utensils makes everything feel cramped and chaotic. Overhead racks are a smart way to free up space while keeping your essential cookware within arm’s reach. It’s a practical upgrade that adds a touch of professional kitchen style.
Picture a sturdy metal rack suspended from the ceiling or mounted on the wall, with pots and pans hanging like a culinary art installation. Utensils dangle from hooks, easily accessible for cooking. The open display adds an industrial or contemporary vibe, making your kitchen look organized and stylish. The sound of clinking metal creates a lively atmosphere.
Choose between wall-mounted or ceiling-mounted racks, depending on your space. Use different hooks or holders to accommodate various pot sizes and utensils. Opt for finishes like matte black, stainless steel, or brass to match your decor. For a softer look, add fabric or silicone grips to protect cookware.
Install sturdy anchors into wall studs or ceiling joists to support weight. Select hooks that are easy to remove or adjust for different items. Arrange pots and utensils by size or frequency of use for maximum efficiency. Keep the rack clean and check hooks regularly for stability. Ensure there’s enough clearance for handling pots.
Add decorative elements like colorful grips or vintage-style hooks for personality. Incorporate a small shelf or magnetic strip nearby for spices or small tools. Use matching or contrasting finishes to tie the look into your overall decor. Keep frequently used items at the front for convenience.
Overhead racks streamline your cooking space and add visual interest. They make everything more accessible, turning clutter into a feature. Once you see how much easier cooking becomes, you’ll want to upgrade every small kitchen.
15. Use Compact, Stackable Cookware and Storage Biles
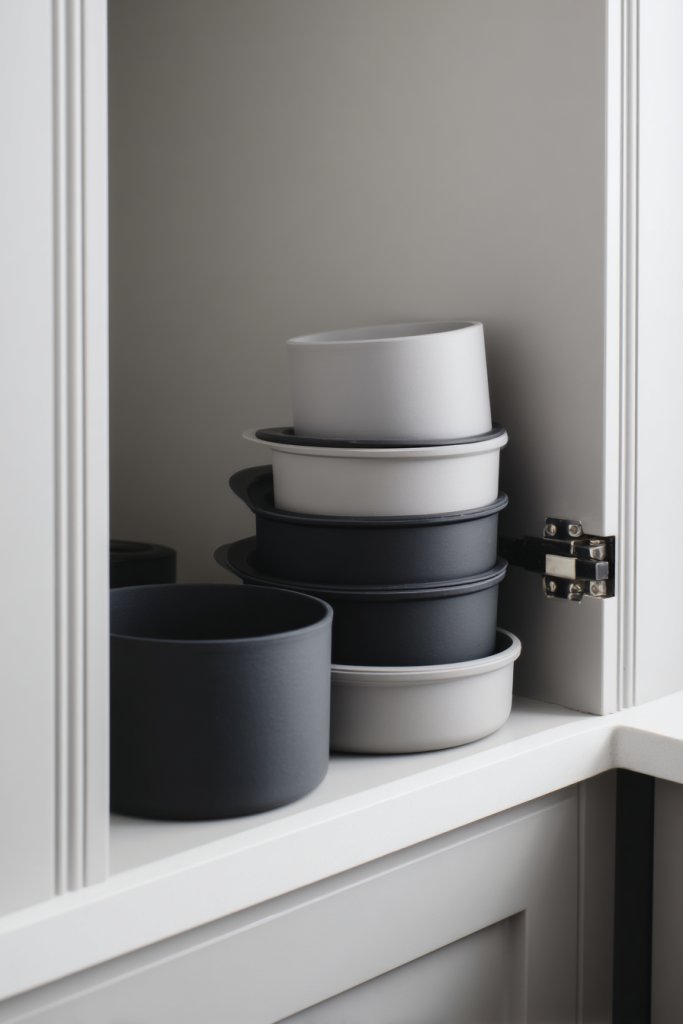
Stacked and nested cookware can save your tiny kitchen from overflowing cabinets. Compact, stackable storage solutions keep your pots, pans, and containers organized and easy to find. It’s a simple way to maximize space and minimize clutter.
Imagine a set of nesting pots and pans, each fitting perfectly inside the next, occupying only a fraction of the space. Stackable food storage containers come in various sizes, fitting neatly into each other for compact storage. Clear lids and bodies make it easy to identify contents at a glance. This tidy setup looks sleek and modern, reducing visual chaos.
Choose nesting sets in durable materials like stainless steel or silicone for flexibility. Use silicone lids or stackable baskets for dry goods or utensils. Match containers with your overall color scheme or go for transparent to see everything clearly. Use risers or tiered organizers inside cabinets for additional vertical stacking.
Sort your cookware by size and function, then nest or stack them carefully to prevent scratching. Use shelf risers or stacking racks to add height and maximize vertical space. Store frequently used items at the front for easy access. Regularly check for damaged or worn items and replace as needed. Label containers for quick identification.
Decorate with colorful lids or labels to add a personal touch. Use matching sets for a cohesive look or mix and match for an eclectic vibe. Incorporate silicone or fabric sleeves for extra grip and protection. Keep the setup simple and functional, emphasizing ease of use.
Stackable cookware keeps your cabinets looking neat and feels like a magic trick for small spaces. It makes every inch count and keeps your kitchen organized. Once you get used to this system, you’ll wonder how you ever managed without it.
16. Incorporate a Clear, Open Floor Plan with Minimal Clutter

A cramped kitchen with lots of furniture and clutter feels suffocating and hard to work in. Embracing an open floor plan with minimal furniture helps your small space breathe. It creates an airy, inviting environment that feels larger than it actually is. Less is more, especially in tiny kitchens.
Visualize a wide-open space with only essential furniture—perhaps a slim island or a small dining table. Open shelving replaces bulky cabinets, allowing light to flow freely. Clear pathways and uncluttered surfaces make the room inviting and easy to navigate. The overall vibe is minimalist and calming, like a breath of fresh air.
Choose multi-purpose furniture that doubles as storage, such as a bench with hidden compartments or foldable tables. Use color schemes that blend seamlessly to create a sense of unity and space. Incorporate open shelving or glass-front cabinets to reduce visual weight. Keep decorative elements sparse and carefully curated.
Start by removing unnecessary furniture and bulky cabinetry. Opt for sleek, space-saving furniture pieces with clean lines. Use open shelving instead of traditional cabinets where possible. Keep countertops free of clutter by storing items out of sight but accessible. Maximize natural light and use light colors to enhance the sense of space. Regularly declutter to maintain the open feel.
Add personal touches with simple, functional decor like a soft throw or a small decorative bowl. Incorporate textured textiles for warmth without crowding the space. Use transparent containers and minimal hardware to keep surfaces clean. Keep decorations minimal but meaningful, emphasizing simplicity.
An open, clutter-free kitchen feels more spacious and relaxing, encouraging more cooking and socializing. It demonstrates that less truly is more when it comes to small space design. Once you experience the freedom of an open layout, you won’t want to go back.
17. Add a Small, Wall-Mounted Backsplash Organizer
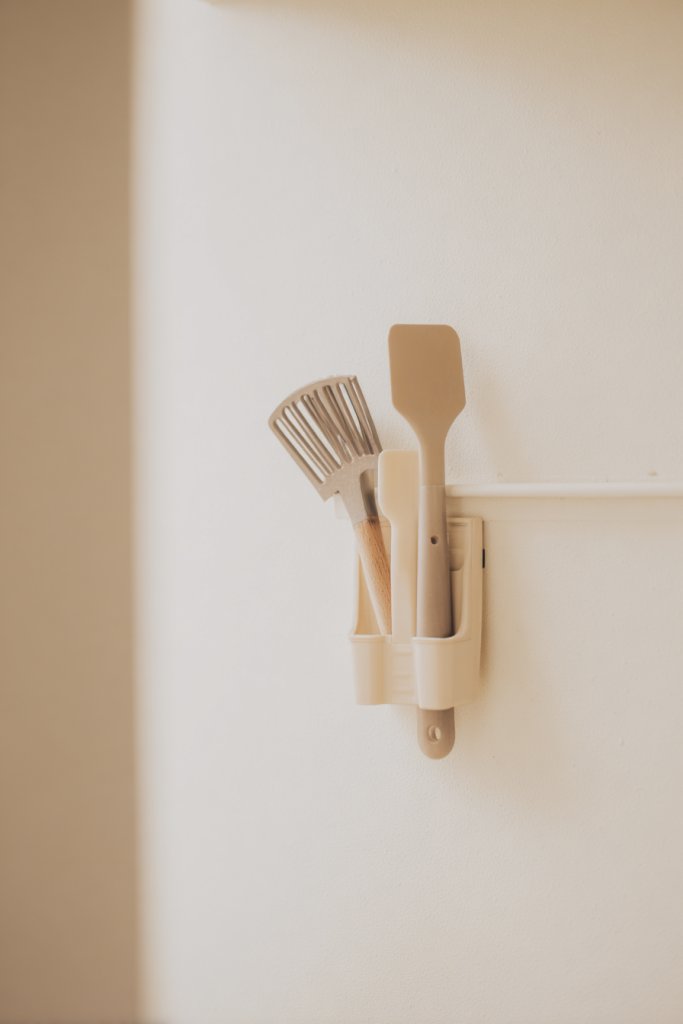
Counter space is precious in tiny kitchens, and cluttered surfaces make everything harder. A small wall-mounted backsplash organizer helps keep essential tools handy without taking up counter real estate. It’s a simple upgrade that offers big benefits for efficiency and tidiness.
Picture a magnetic strip or small rack mounted behind the sink or stove, holding sponges, brushes, or utensils. The organizer is sleek and minimal, blending into the wall while serving a practical purpose. It keeps your workspace clean and uncluttered while adding a subtle decorative touch.
Choose magnetic strips, small racks, or a combination tailored to your needs. Use waterproof or heat-resistant materials for near the stove. Incorporate small containers or hooks for frequently used tools. Match finishes to your hardware or backsplash tiles for a cohesive look.
Install the organizer securely into wall studs or anchors, ensuring stability. Arrange items logically—sponges near the sink, utensils at hand. Regularly clean to prevent grease buildup or dust. Adjust placement as needed for convenience. Keep it simple and accessible for daily use.
Decorate with colorful or patterned containers for a fun twist. Use labels or small magnetic tags for organization. Incorporate a small decorative element like a ceramic tile or textured backing for added style. Keep it functional, not cluttered.
A small backsplash organizer keeps your essentials within easy reach and your surfaces clear. It’s a little upgrade with a big impact on your daily routine. Once you see the convenience, you’ll wonder why you didn’t install it sooner.
18. Use Drawer Dividers and Inserts for Better Organization

Messy drawers turn a small kitchen into a chaotic nightmare. Drawer dividers and inserts help keep utensils, knives, and small tools neatly separated. They make finding what you need quick and easy, reducing clutter and frustration.
Imagine a sleek, modular set of dividers within your utensil drawer, organizing spoons, forks, and knives into tidy sections. Small compartments hold measuring spoons, clips, or other small gadgets. Everything has its place, and nothing gets lost or tangled. The result is a streamlined, usable space that looks as good as it functions.
Choose adjustable or customizable dividers to fit your specific needs. Use bamboo, plastic, or metal materials that match your decor. Incorporate soft-lined or cushioned inserts for delicate items. Keep frequently used tools at the front for quick access, and store rarely used items at the back.
Empty your drawers and measure their dimensions. Select dividers that can be adjusted or arranged in multiple configurations. Install inside the drawer, ensuring they stay in place during use. Organize items by type or frequency of use, and label sections if needed. Regularly review and reorganize to maintain order.
Customize with decorative trims or color-coding for easy identification. Incorporate soft fabric liners for delicate or fragile items. Use matching materials for a cohesive look. Keep it simple but tailored to your specific organizational style.
Drawer dividers turn cluttered drawers into efficient storage zones. They save time and reduce stress during busy mornings. Once you see how easy it is to find everything, you’ll want to organize all your drawers.
19. Install Under-Cabinet Hooks for Mugs and Towels
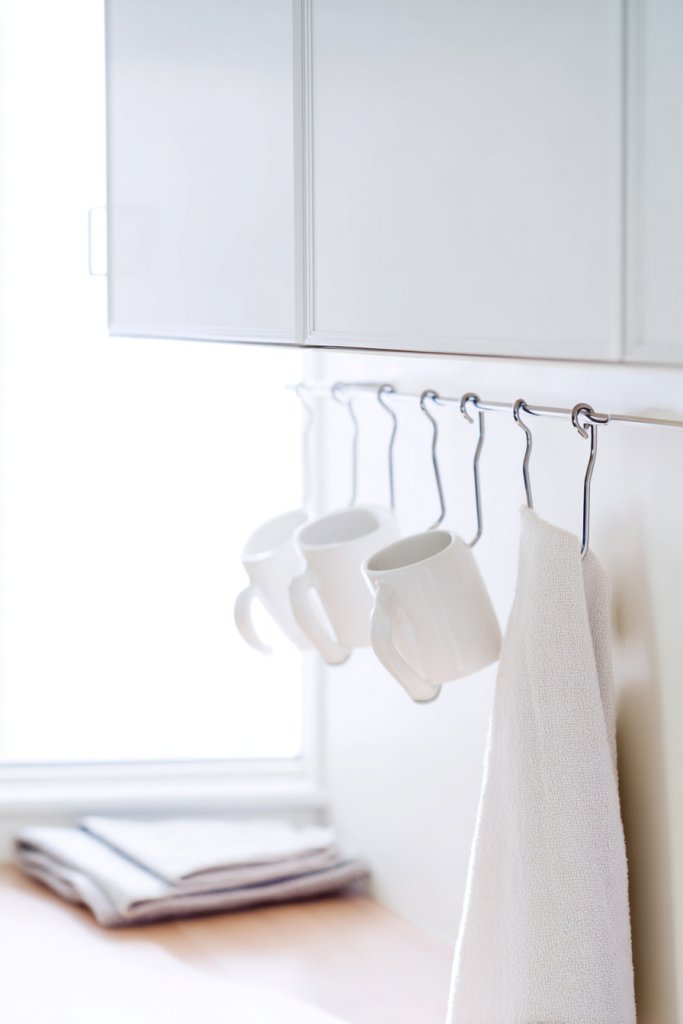
Counter space is at a premium, and cluttered counters make small kitchens feel even tighter. Under-cabinet hooks are a simple solution to hang mugs, towels, or small utensils, freeing up valuable surface area. Plus, they add a touch of functional decor.
Visualize a row of hooks underneath your upper cabinets, holding colorful mugs and neatly hung dish towels. The hooks are slim and unobtrusive, keeping everything within easy reach. This setup adds a sense of order and style without sacrificing space. It’s like having a mini display rack in your kitchen.
Choose hooks in finishes that match your hardware — matte black, brushed nickel, or brass. Use different sizes or shapes to accommodate various items. For a playful look, opt for colorful hooks or decorative designs. Group similar items together for a cohesive, organized appearance.
Install hooks securely into the underside of cabinets with appropriate anchors. Measure spacing for uniformity and easy access. Use a level to ensure proper alignment. Regularly clean hooks and replace any that become loose or rusty. Keep frequently used mugs and towels within easy reach.
Add decorative touches by choosing hooks with unique shapes or embellishments. Incorporate matching or contrasting colors to enhance your decor. Use small baskets or clips nearby for additional organization. Keep the arrangement simple and functional.
Under-cabinet hooks keep your kitchen tidy and stylish, making daily routines smoother. They turn clutter into display and boost efficiency. Once you enjoy the convenience, you’ll want to add hooks everywhere possible.
20. Incorporate a Sliding or Pocket Door Entrance

Traditional doors swing into your small kitchen, taking up space and often causing bottlenecks. Sliding or pocket doors eliminate this issue, opening up your layout and making navigation smoother. It’s a simple upgrade that transforms your space’s flow.
Imagine a sleek, hidden door sliding into a wall cavity, leaving no swing area. When closed, it looks seamless, maintaining a clean aesthetic. When opened, it provides full access, making the space feel larger and more open. The minimalist design adds a modern touch to your small kitchen.
Choose from various finishes—painted wood, frosted glass, or metal—to match your decor. Use hardware that blends in seamlessly or adds a statement. Consider bi-fold or accordion pocket doors for even tighter spaces. They work well in open-plan kitchens or between rooms.
Plan door placement carefully, ensuring structural support within your wall cavity. Hire a professional if needed to create the pocket or install a sturdy sliding track. Ensure smooth operation with quality hardware and proper alignment. Seal edges for insulation and soundproofing if required. Regular maintenance keeps the door sliding effortlessly.
Add a decorative handle, or paint the door to match your walls for a cohesive look. Incorporate soft-close mechanisms for quieter operation. For a more dramatic effect, consider frosted or textured glass panels. Keep the surrounding area clutter-free for maximum visual impact.
Sliding and pocket doors redefine small space functionality, making your kitchen feel more open and accessible. They’re a smart, stylish solution that adds value and convenience. Once installed, you’ll wonder how you ever managed without them.
21. Choose Minimalist, Handle-Less Cabinet Designs
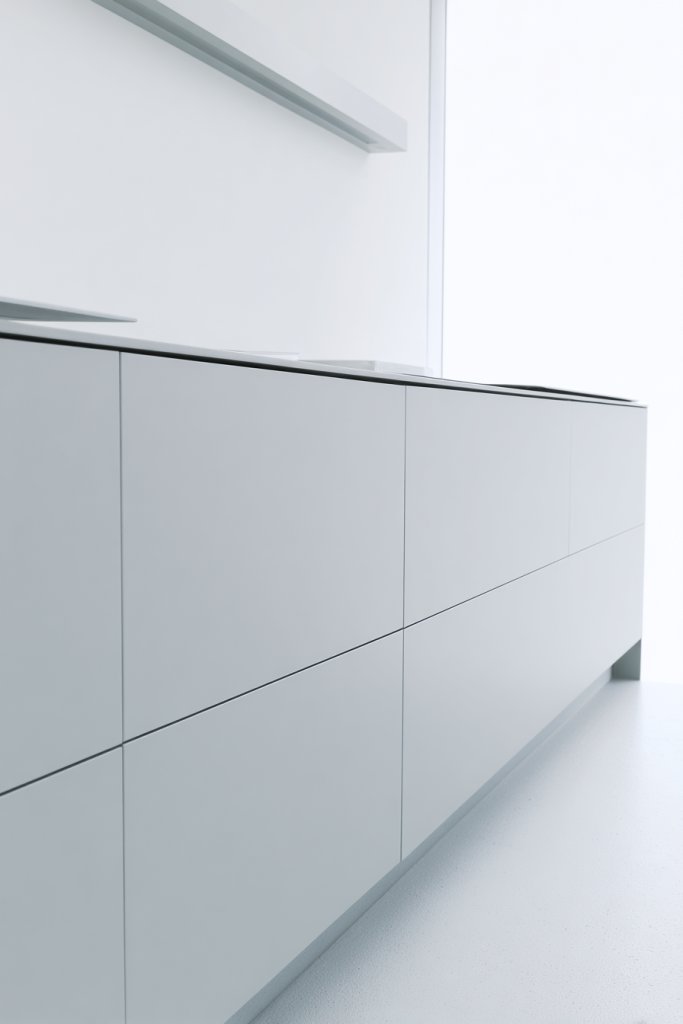
Cluttered, bulky cabinets with knobs and pulls can overwhelm a small kitchen’s clean look. Minimalist, handle-less designs bring a sleek, modern vibe that visually enlarges the space. They create a seamless, clutter-free appearance that’s both stylish and functional.
Picture smooth, flat-front cabinets with push-to-open latches, giving a clean, uninterrupted surface. The absence of handles keeps the eye moving across the cabinetry, enhancing the sense of openness. This minimalist aesthetic pairs beautifully with contemporary decor and neutral tones. The overall effect is a sophisticated, uncluttered look.
Opt for matte or gloss finishes in neutral shades for maximum impact. Incorporate subtle grooves or edge pulls if handles are preferred but want to maintain a clean look. Use integrated touch-to-open mechanisms for a high-tech feel. This style works well in both small and large kitchens, adapting to various decor themes.
Choose cabinetry with built-in, push-to-open hardware or install magnetic catch mechanisms. Ensure smooth closing and opening with quality hinges and latches. Maintain a consistent finish for aesthetic harmony. Regularly clean surfaces to keep them looking pristine. Consider professional installation for perfect alignment.
Personalize with contrasting trims or accents that highlight the handle-less design. Incorporate lighting underneath or inside cabinets for a subtle glow. Use decorative edging or textured finishes to add depth. Keep the design simple but elegant, emphasizing functionality.
Handle-less cabinetry creates a streamlined, modern look that makes your small kitchen feel larger and more organized. It’s a sophisticated upgrade that combines form and function effortlessly. Once you embrace this style, you’ll never want traditional handles again.
Conclusion
From innovative storage solutions to stylish color schemes and space-saving layouts, these small kitchen design ideas demonstrate that a compact space can be both functional and beautiful. Embrace these ideas and personalize them to suit your unique home and lifestyle. Don’t hesitate—start implementing one or two today and watch your kitchen become a stylish, efficient haven that truly works for you!