Imagine stepping into a room that instantly energizes you every time you enter—that’s the magic of a beautifully painted wall! Wall painting ideas are incredibly popular because they offer an affordable, creative way to refresh any space and express your personal style.
In this article, you’ll find a diverse array of vibrant wall painting ideas that can transform your home into a colorful haven. From bold geometric patterns to calming murals, these ideas cater to all tastes and skill levels, inspiring you to create a space that truly reflects your personality.
1. Bold Geometric Wall Patterns with Painter’s Tape
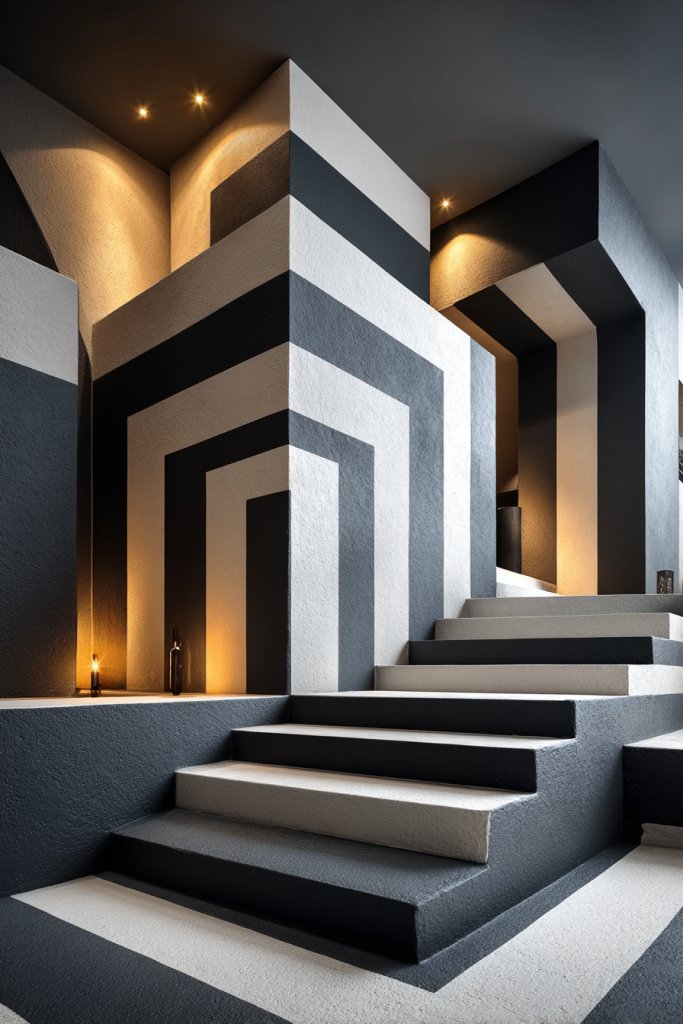
Ever get tired of boring, plain walls that do nothing to excite your space? Sometimes all it takes is a bold pattern to transform an entire room from dull to dynamic. The idea of creating sharp, eye-catching designs might sound intimidating, but it’s surprisingly simple and budget-friendly. If you crave a statement wall that screams personality, geometric patterns are your answer.
Picture a wall with crisp lines intersecting in perfect angles, painted in contrasting shades like navy and blush or emerald and gold. The tape acts like a stencil, creating clean edges that elevate the design. The colors pop against neutral backgrounds, making the room feel modern and energetic. Light bounces off the sharp lines, adding depth and dimension that draws the eye immediately.
You can customize this idea by choosing softer pastels for a subtle touch or bold primary colors for maximum impact. Smaller rooms benefit from intricate, tight patterns, while larger walls can handle oversized shapes for a more dramatic effect. For seasonal variation, swap out colors to match holiday themes or mood shifts. This technique adapts well to bedrooms, living rooms, or even home offices.
Gather painter’s tape in various widths, along with your chosen paint colors. Start by sketching your design lightly with a pencil or chalk for guidance. Apply tape carefully along your lines, pressing firmly to prevent bleed-through. Paint within the taped sections with a brush or small roller, allowing each color to dry fully before removing the tape. For extra precision, use a level or ruler to keep lines straight. Clean-up involves peeling tape slowly to reveal sharp, defined edges.
Add metallic or contrasting trim along the geometric shapes for a luxe feel. Incorporate different textures, such as matte and gloss paint, to create visual interest. For an artistic touch, include some hand-painted details or metallic accents in select sections. Personalize the palette to reflect your style—think bold and bright or soft and muted—whatever makes your space uniquely yours.
Bold geometric walls boost confidence in your DIY skills and can turn a plain room into a gallery-worthy feature. They’re perfect for modern, minimalist, or eclectic decor styles. Once complete, you’ll love how a simple technique can redefine your entire space and showcase your creativity. Ready to get those lines straight and make a statement?
2. Ombre Gradient Walls for a Soft, Colorful Transition
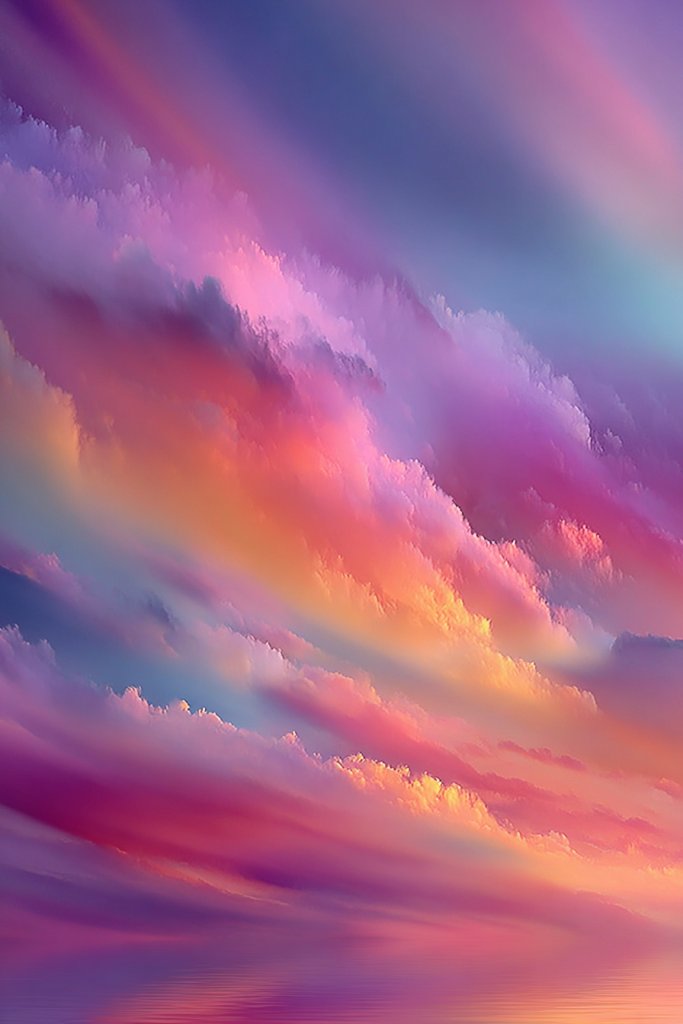
Ever wish your walls could shift colors seamlessly like a sunset or a gentle dawn? An ombre gradient creates a calming yet vibrant atmosphere that feels both sophisticated and soothing. The challenge is achieving a smooth transition without it looking patchy or uneven, but with the right techniques, it’s entirely doable. If you crave a wall that adds depth and a sense of flow, this is your go-to idea.
Imagine a wall blending from a soft blush pink at the top to a deep coral or plum at the bottom. The colors melt into each other, creating a velvety gradient that seems to glow with natural light. The subtle shift invites your eye to wander, making the room feel more expansive and tranquil. The velvety finish reflects light softly, giving your space a luminous quality that’s hard to beat.
Choose colors based on your mood or season—cool blues and greens for freshness, warm oranges and reds for coziness. For smaller spaces, a vertical gradient can elongate walls; for larger rooms, horizontal fades add width. You can also layer multiple shades for a more complex, textured look or keep it simple with two to three hues. This effect works well in bedrooms, bathrooms, or even hallways where you want to evoke a sense of calm.
Start by selecting your color palette and preparing your wall with a primer if necessary. Use a sponge, brush, or roller to blend colors while they’re still wet, working from light to dark or vice versa. Keep a clean, damp sponge or brush handy to soften lines and create a seamless transition. Work in sections, blending the edges thoroughly with gentle strokes. Finish with a clear sealant or semi-gloss topcoat to enhance the colors and add durability.
Add metallic or pearl-like accents in some areas for extra shimmer. Incorporate textured paints or glazes for a more tactile feel. Personalize your gradient with subtle speckles or streaks that mimic natural elements like clouds or water. Pair with minimalist decor or soft textiles to amplify the tranquil vibe, making your wall a true focal point.
Ombre walls transform any space into a soothing retreat and are perfect for those afraid of busy patterns. They’re trendy but timeless, making your room feel fresh and stylish. Plus, mastering this technique will boost your confidence for future painting projects. Ready to fade into a more beautiful space?
3. Metallic Accents with Gold or Silver Leafing
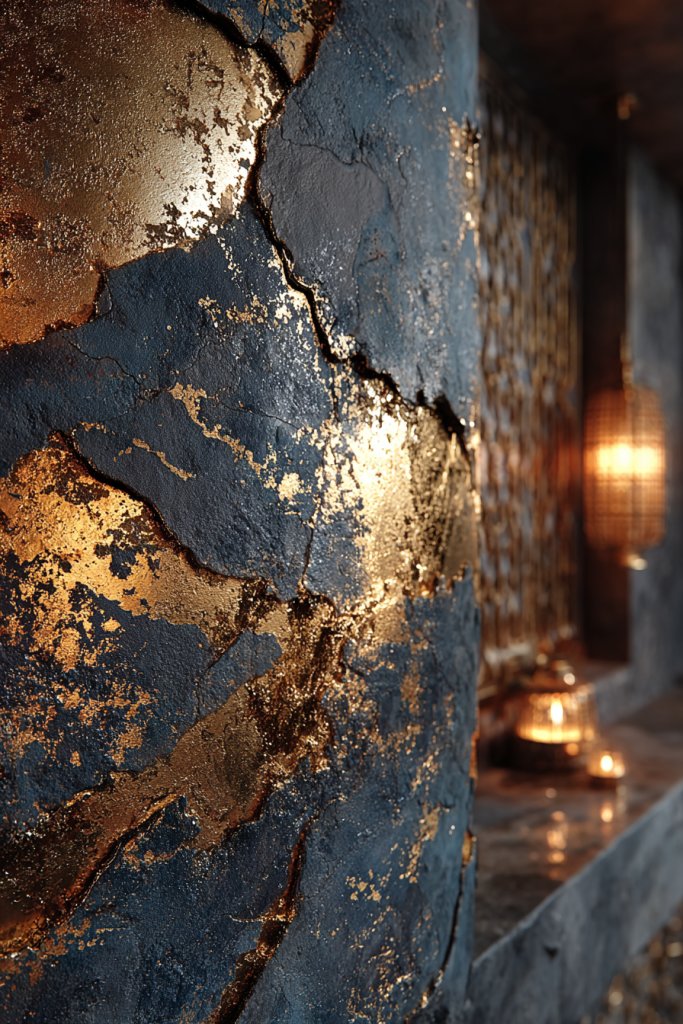
Feeling like your walls are missing that luxe, high-end touch? Metallic accents instantly elevate a space, giving it a glamorous or modern edge. The trick is adding just enough shine without overwhelming the room. If you love a touch of opulence but don’t want a full-blown gold rush, subtle leafing might be your new best friend.
Picture a matte painted wall with delicate streaks of gold or silver leaf applied along the edges or in abstract patterns. The metallic shimmer catches the light at different angles, creating an ever-changing visual effect. It’s like having a piece of jewelry embedded in your wall—sophisticated, shiny, and understated. The subtle glow adds warmth and richness that instantly draws attention.
You can highlight specific areas like corners, trims, or entire feature walls for maximum impact. Mixing matte paint with metallic accents creates a layered, textured look. For a more contemporary vibe, try geometric shapes or abstract designs with metallic finishes. Seasonal options include swapping out metallic shades for warmer hues in winter or cooler silvers in summer.
Apply a base coat of your preferred paint color, then wait for it to dry completely. Use a brush or sponge to carefully apply adhesive or size in desired areas. Gently press sheets of gold or silver leaf onto the adhesive, smoothing out air bubbles with a soft brush. Seal the leaf with a clear varnish or topcoat to protect the shine. For a more controlled application, consider using metallic paint or foil sheets instead of leafing.
Create accent shapes like stars, stripes, or geometric patterns with metallic foil for a modern look. Combine different metallic shades for a layered, dynamic effect. Embellish with textured paints or gloss finishes to add depth. Personal touches like custom monograms or motifs can make the metallic wall uniquely yours.
Metallic accents add instant sophistication and work beautifully with minimalist or glam decor styles. They’re perfect for making a small space appear more luxurious. Once you master leafing techniques, you’ll feel confident experimenting with other metallic finishes. Ready to add some shine?
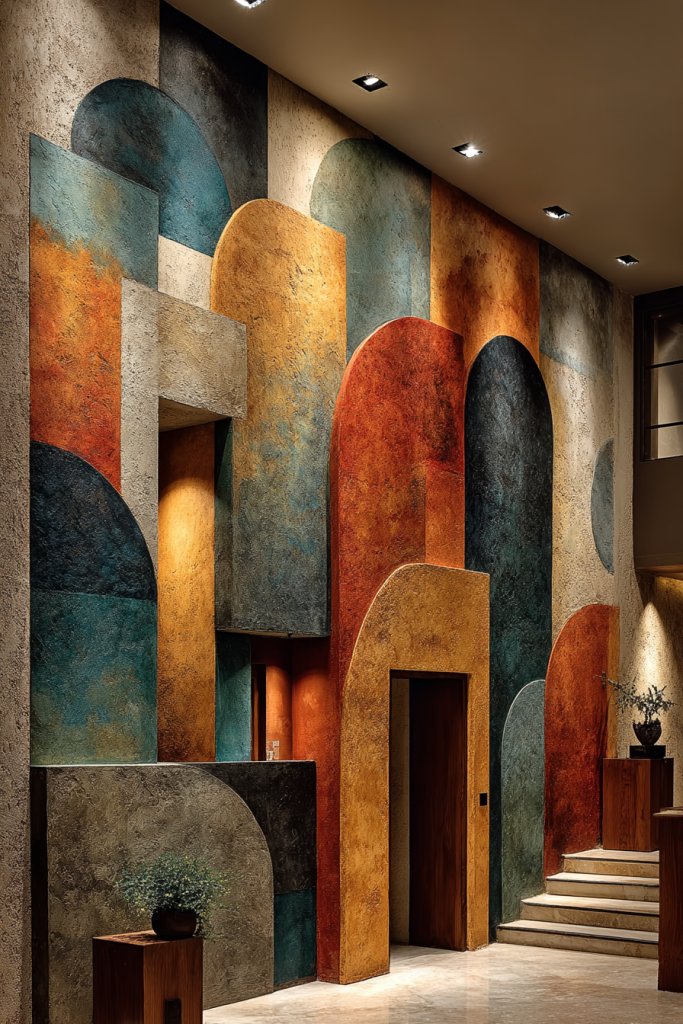
4. Bright Color Block Walls for Modern Impact
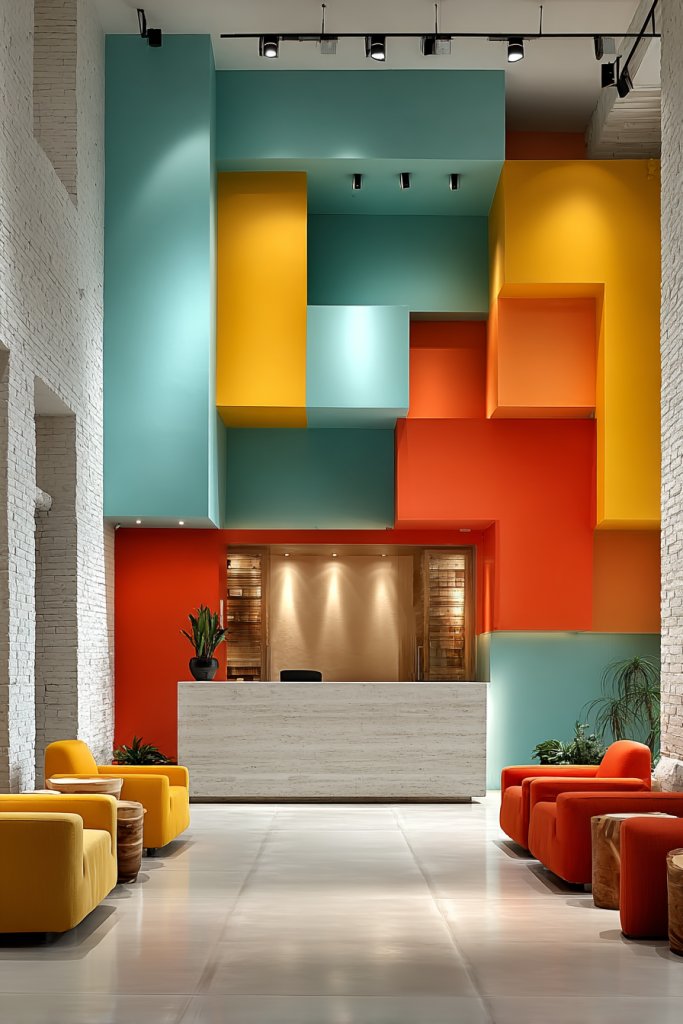
Do your walls lack personality and leave the room feeling flat? Bright color blocks create a bold visual statement that energizes any space instantly. The challenge is balancing colors so they complement rather than clash. If you want a modern, playful vibe that also feels curated, color blocking is a fantastic choice.
Imagine a wall divided into large, vibrant sections—like a giant canvas painted in bold shades of turquoise, coral, and lemon. Each block defines a different zone or simply adds visual interest to an otherwise plain wall. The clean lines and bright hues create a lively, youthful atmosphere that’s impossible to ignore. It’s like an art piece that doubles as wall decor.
Choose contrasting or harmonious colors depending on your style—think jewel tones for richness or pastel shades for softness. You can create asymmetrical blocks for a dynamic look or grid-based patterns for structure. For seasonal changes, swap out the colors or add metallic accents for a festive touch. Small rooms benefit from vertical or horizontal blocks to add height or width.
Start by sketching your design on paper or lightly drawing with a pencil on the wall. Use painter’s tape to outline each block precisely, pressing firmly to prevent leaks. Fill in each section with high-quality wall paint, using brushes or rollers for smooth coverage. Remove the tape carefully once the paint is dry to reveal crisp edges. For added durability, apply a clear sealant or semi-gloss topcoat.
Add metallic or glitter accents along the edges for extra sparkle. Incorporate textured paints or matte finishes to create depth. Personalize by including patterns or motifs within the blocks, such as stripes or polka dots. Pair with neutral furniture and accessories to make the colors pop.
Bright color blocks turn dull walls into lively focal points and showcase your bold personality. They’re perfect for creative spaces or kids’ rooms, but can work in any modern environment. Once you see how simple tape and paint can transform your wall, you’ll feel inspired to tackle more daring projects. Go on, make a splash!
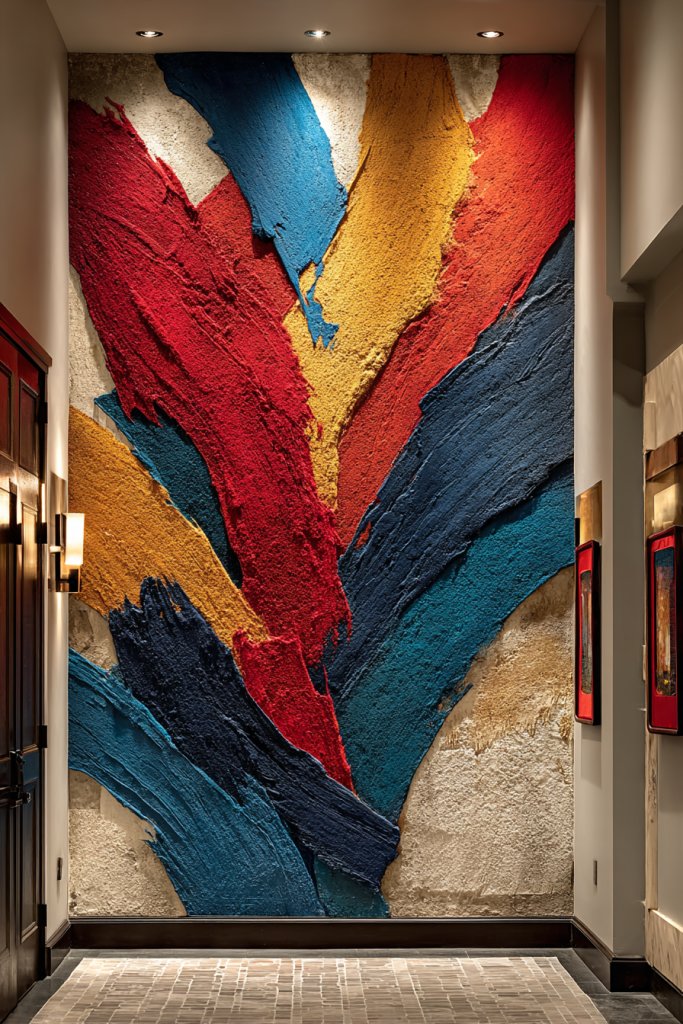
5. Hand-Painted Mural with Abstract Shapes
Looking for a way to add a personal, artistic touch to your space? A hand-painted mural with abstract shapes can turn a plain wall into a stunning piece of art. The idea sounds intimidating, but with some basic skills and a little patience, you can create something truly unique. If you want your walls to tell a story or evoke emotion, murals are the way to go.
Imagine sweeping, flowing lines in bold colors that intertwine and overlap, creating a sense of movement and energy. The shapes can be organic or geometric, depending on your style, and can feature splashes of metallic or matte paint for contrast. The mural feels alive, as if it’s a window into a different world—dynamic, colorful, and full of personality. It’s like having a huge piece of artwork that you made yourself.
Choose a color palette that complements your existing decor or sets a new mood—bright and playful or muted and sophisticated. Abstract shapes work well in large, open spaces like living rooms or bedrooms, but can also be scaled down for smaller nooks. Incorporate metallic or textured paints for additional depth. Seasonal or thematic variations can be achieved by changing colors or overlaying new designs.
Begin by sketching your design on paper, then transfer it onto the wall with light pencil markings or projector tracing. Use high-quality acrylic or wall paint for easy blending and correction. Work in layers, starting with background shapes and building up to foreground details. Use brushes of varying sizes for precision and fluidity. Seal the mural with a clear matte or semi-gloss finish to protect your work.
Incorporate metallic accents, splashes of glitter, or textured paints to add richness. Personalize your mural by including symbols, initials, or motifs meaningful to you. Experiment with different brush techniques, like sponging or dry brushing, for a more textured look. This is your chance to showcase your creativity and make the space truly yours.
A mural is a bold way to express your personality and artistic flair. It can serve as a conversation starter and a source of daily inspiration. The process builds confidence in your painting abilities and encourages more creative projects. Ready to turn your wall into a masterpiece?
6. Neon Chalkboard Wall for Interactive Fun

Ever wanted a wall that’s both functional and fun? A neon chalkboard wall combines creativity, practicality, and a splash of color. It’s perfect for note-taking, doodling, or just adding a playful vibe to your space. The challenge is making it pop without feeling overwhelming, but with the right tools, it’s a game-changer.
Envision a wall coated in vibrant neon chalkboard paint, glowing under blacklight or in daylight with a bright hue like pink, green, or blue. The surface invites spontaneous drawings, messages, or schedules, constantly changing and evolving. The neon effect energizes the room, making it an interactive centerpiece. Whether in a kitchen, playroom, or home office, it’s a dynamic way to express yourself.
Use neon colors for bold statements or more subdued shades for a toned-down look. Incorporate geometric or freeform shapes around the chalkboard area for added flair. Seasonal themes or holiday messages can be easily added and erased. Pair with colorful accessories or furniture to amplify the playful atmosphere.
Apply a quality neon chalkboard paint in a smooth, even coat on your chosen wall. Use painter’s tape to create borders or sections if desired. Once dry, start doodling or writing with chalk, and consider using chalk markers for vibrant, long-lasting lines. To keep the surface smooth, erase regularly and avoid using harsh cleaners. Add a led strip or blacklight nearby to enhance the neon glow.
Personalize with custom chalkboard labels or stencils for neatness. Incorporate magnetic paint in certain sections for added versatility. Change up the theme seasonally, from holiday greetings to motivational quotes. Use colorful chalk or markers to keep the visuals lively and engaging.
A neon chalkboard wall invites interaction and sparks creativity, making your space more lively. It’s perfect for families, students, or anyone who loves a bit of playful chaos. Mastering this idea encourages confidence in DIY painting and creative expression. Ready to turn your wall into a colorfully interactive canvas?
7. Striped Walls with Varying Widths and Colors
Tired of dull, monotonous walls that fail to add character? Stripes in different widths and colors can instantly energize your space with a playful yet sophisticated vibe. The trick is balancing boldness with harmony so your room doesn’t look chaotic. If you love a dynamic look that’s easy to customize, stripes are your best bet.
Imagine a wall with wide navy and crisp white stripes, or maybe a series of pastel pinks and mint greens in varying widths for a softer touch. The alternating lines create a rhythmic pattern that guides the eye across the room. The visual movement adds depth and makes even small spaces appear larger. It’s like a visual melody that makes your decor sing.
Experiment with bold contrasting colors for maximum impact, or stick with tonal shades for a subtle effect. Vertical stripes elongate ceilings, while horizontal stripes add width. Use painter’s tape for crisp lines, and consider adding metallic or glitter accents for extra flair. This pattern suits bedrooms, living rooms, and even hallways, adapting easily to different styles.
Sketch your stripe pattern lightly with a pencil on the wall, then tape each section carefully, pressing firmly to prevent bleeding. Use high-quality wall paint and a steady hand to fill in each stripe. Remove tape slowly once paint is dry to reveal sharp lines. For a polished look, seal with a clear protective coat. Take your time to ensure all lines are straight and consistent.
Add metallic or glitter detailing along the edges of your stripes for a shimmering effect. Incorporate subtle textured paints within some stripes for added depth. Personalize by adding small motifs or initials in certain sections. Pair with minimalist furniture to let the stripes shine or with eclectic decor for a bold statement.
Striped walls are a timeless way to add personality without overwhelming your decor. They’re versatile enough to suit classic, modern, or eclectic styles. Successfully executing this look will boost your confidence for future DIY projects. Ready to stripe your way to a more stylish room?
8. Tropical-inspired Jungle Wall with Lush Green Shades

Craving a fresh, lively vibe that transports you to a tropical paradise? A jungle wall filled with lush green shades and leafy patterns creates an energizing, nature-inspired retreat. The challenge is avoiding a cluttered look while capturing the essence of a jungle’s vitality. If you love bold, vibrant decor with a hint of wanderlust, this idea is perfect.
Visualize a wall covered in oversized leafy motifs in various shades of green, from emerald to olive to lime. The pattern can include abstract or stylized leaves, vines, and tropical flora, creating a sense of depth and movement. The textured paint or stenciled design mimics the richness of a jungle canopy. The vibrant greens evoke freshness, vitality, and a calming connection to nature.
Choose between a fully leafy mural or a more subtle, background pattern for a hint of greenery. Incorporate accents in warm earth tones or bright tropical colors like pink and orange. Seasonal changes can involve swapping out leaves for flowers or adding decorative elements like faux bamboo or rattan furniture. This concept suits feature walls in living rooms, bedrooms, or even outdoor patios.
Start by selecting or creating stencils of tropical leaves, then use spray paint, sponge, or brush techniques to fill in the shapes. Layer different greens to add realism and depth. Use painter’s tape to define the boundaries and ensure clean edges. For a more textured look, consider using a sponge or stippling brush. Seal with a clear matte or semi-gloss finish for durability.
Add decorative elements like faux vines, woven textures, or metallic leaf accents for extra richness. Incorporate small sculptures or floating shelves with tropical-inspired decor. Personalize with initials or motifs that evoke your favorite parts of a jungle experience. Pair with natural textiles like linen or rattan to complete the look.
A jungle wall brings vitality and a fresh perspective to your space, making it feel alive and inviting. It’s a bold statement that also connects you with nature, even indoors. Mastering this technique will inspire you to explore other stencil or mural projects. Ready for a lush, tropical transformation?
9. Colorful Stenciled Patterns for Detailed Elegance
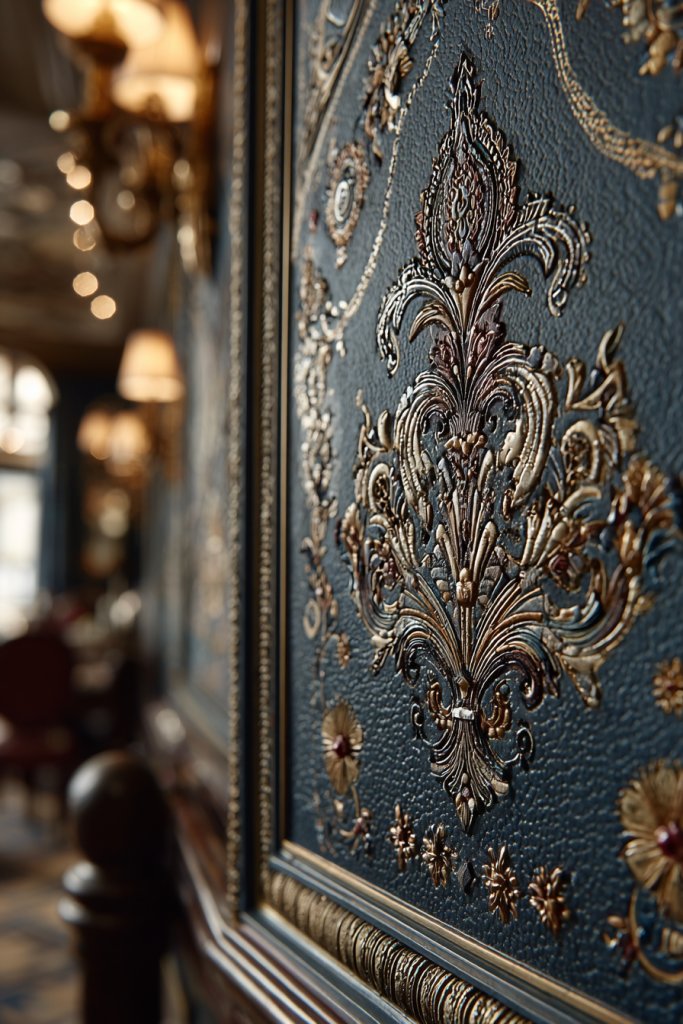
Want to add intricate details to your walls without the expense of custom artwork? Stenciled patterns offer a way to achieve elegance and personality with precision. The challenge is selecting the right motif and avoiding a cluttered look, but with care, you can create a sophisticated feature. If you love detailed, artistic touches, this idea is perfect.
Imagine delicate floral motifs, ornate medallions, or geometric lattice designs repeated across your wall in vibrant or subtle shades. The pattern adds a layer of texture and visual interest, elevating your decor to a more refined level. The contrast between the pattern and a plain background creates a striking focal point that captures attention. It’s like wallpaper but more customizable and personal.
Opt for classic motifs like damask, Moroccan tiles, or modern geometric shapes depending on your style. Use metallic paints or gloss finishes to add shimmer and depth. Scale the pattern larger for bold impact or keep it small and intricate for subtle elegance. Seasonal themes can be incorporated by changing colors or motifs.
Choose a stencil design and secure it flat against your wall with painter’s tape. Use a stencil brush or sponge to dab paint carefully within the cut-outs, avoiding excess paint that can bleed. Work in layers, allowing each to dry before reapplying. For complex designs, consider using a projector to trace the pattern before painting. Seal your work with a clear coat to preserve the pattern.
Personalize the pattern with your initials, dates, or custom motifs. Mix matte and gloss paints for contrast, or add metallic accents in certain areas. Incorporate different colors within the pattern for vibrancy or keep it monochrome for elegance. Pair with simple, solid-colored furniture to let the pattern stand out.
Decorative stenciled walls demonstrate your artistic side and can be a conversation starter. They’re a cost-effective way to add detail and luxury without wallpaper. Once you master basic stenciling, you’ll feel confident tackling larger, more complex projects. Ready to add a touch of elegance?
10. Watercolor Art Effects with Soft Bleeding Colors
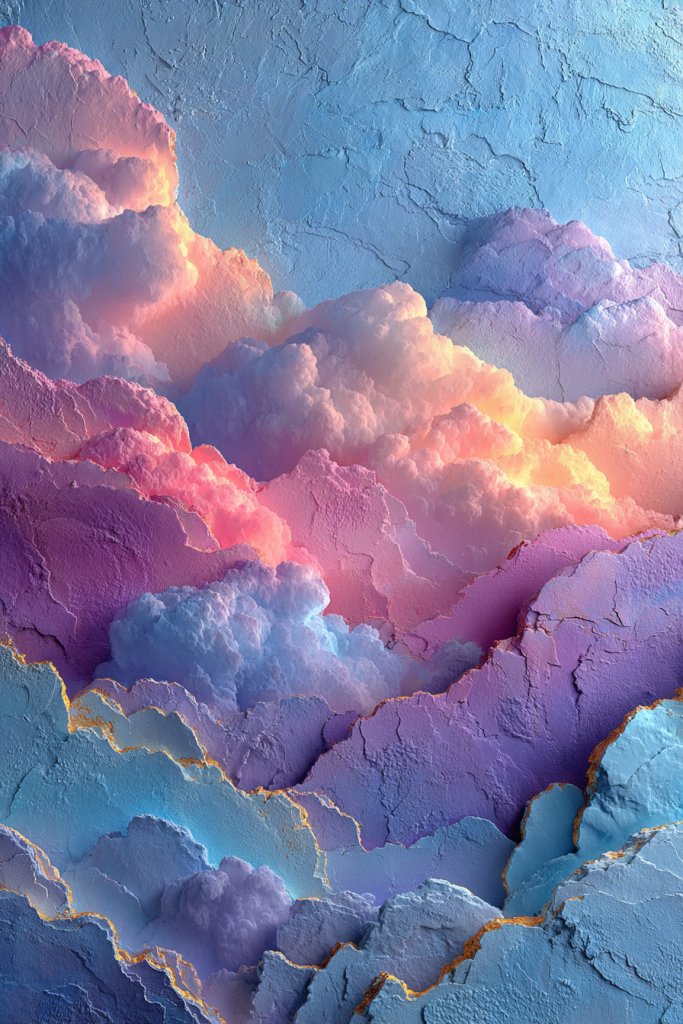
Ever wish your walls could have the same calming, flowing beauty as a watercolor painting? Achieving a watercolor effect on walls adds a dreamy, artistic touch that’s both soothing and vibrant. The challenge is creating the soft, bleeding colors without it looking messy, but with patience, it’s achievable. If you love art and serenity, this idea will inspire your space.
Picture gentle washes of pastel shades blending into each other—lavender merging into pink, or aqua melting into teal. The colors seem to flow naturally, creating a calming backdrop that evokes the feeling of a watercolor sky or ocean scene. The subtle transitions give the wall a soft glow, making the room feel more open and tranquil. It’s like having a living piece of art on your wall.
Opt for monochromatic gradients or multi-shade blends depending on your mood. Use textured brushes, sponges, or even plastic wrap to create the bleeding, layered look. Incorporate metallic or glitter paints sparingly to add shimmer and interest. This technique works well in bedrooms, meditation spaces, or creative studios, adapting to both minimalist and bohemian styles.
Start by preparing your wall with a primer or base coat in a light neutral shade. Use water-based paints and a damp brush or sponge to blend colors directly on the wall. Work quickly to keep the colors wet and flowing, adding more water or paint as needed. Use a clean, damp sponge to soften harsh edges or blend shades further. Finish with a clear protective sealer to preserve the effect.
Add metallic or pearl accents within the watercolor layers for subtle shimmer. Incorporate textured paints or crackle finishes for more depth. Personalize by including abstract shapes or splashes that reflect your personality or mood. Pair with light, airy textiles and minimal furniture to keep the focus on the wall’s artistry.
Watercolor walls evoke peace and creativity, making your space feel like a gallery. They’re a perfect backdrop for artistic or boho decor. Mastering this technique opens doors to more painterly projects and boosts your confidence in freeform painting. Ready to let your walls flow?
11. Bright Abstract Art with Bold Brush Strokes
Tired of walls that just sit there without any energy? Bright abstract art with bold brush strokes delivers a punch of color and movement that instantly energizes your space. The idea is simple but impactful, making your walls the centerpiece of your decor. If you love spontaneous, expressive art, this is your go-to technique.
Imagine large, sweeping strokes of vivid reds, blues, yellows, and blacks layered across a neutral background. The strokes seem to burst with emotion, creating a dynamic focal point that sparks conversation. The raw, energetic feel transforms your wall into a piece of contemporary art, full of life and personality. It’s like capturing a moment of creative chaos on your wall.
Choose a color palette that matches your mood or decor. Use thick, textured brushes or palette knives for more expressive strokes. You can keep the background minimal to emphasize the strokes or add subtle gradients behind for depth. Seasonal or thematic color swaps can keep the look fresh and relevant.
Start by priming your wall with a neutral base. Use high-quality acrylic or oil paints for bold, opaque strokes. Apply the paint quickly and confidently, varying your brush sizes and directions to create movement. Layer strokes to add complexity, and don’t overthink—imperfection adds character. Once finished, seal with a matte or gloss varnish to protect your art.
Incorporate metallic or glitter accents within certain strokes for a shimmering effect. Add splatters or drips for a more rebellious, artistic vibe. Personalize your piece with initials, symbols, or themes that resonate with you. Keep the surrounding decor simple to let the art stand out.
Bold abstract walls showcase your personality and artistic flair and are a conversation starter. They’re forgiving of mistakes, making them perfect for beginners. Mastering this look will inspire confidence to explore more expressive art forms. Ready to make your walls burst with life?
12. DIY Dip-Dye Wall with Two-Tone Color Fade
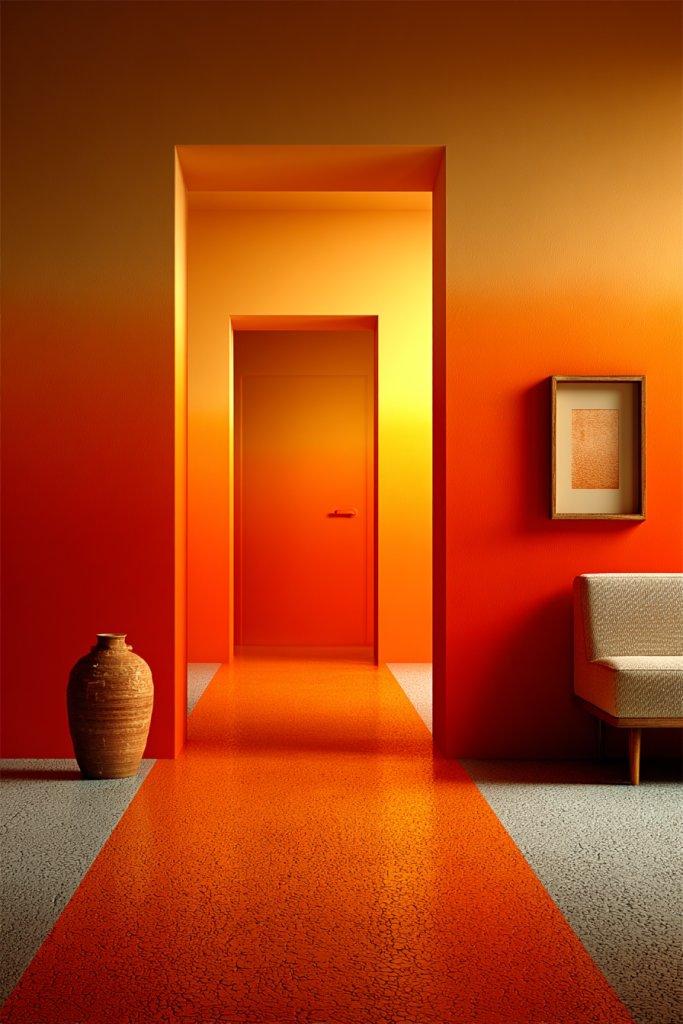
Looking to add a sophisticated touch to your room without complicated designs? A two-tone dip-dye effect creates a sleek, modern gradient that’s surprisingly easy to achieve. The challenge is blending the colors seamlessly, but with the right approach, your wall will look professional and polished. If you love clean, contemporary styles, this idea is perfect.
Visualize a wall transitioning from a deep navy at the bottom to a crisp white at the top, or perhaps a warm amber fading into soft blush. The smooth gradient creates a calming, cohesive backdrop that adds depth to your space. It feels like a soft fabric or a sunset captured in paint, inviting your gaze and calming your mind. This effect enhances both large and small rooms alike.
Experiment with vertical or horizontal fades for different effects—vertical elongates, while horizontal widens the space. Use contrasting colors for a bold statement or similar shades for a subtle transition. Incorporate textured paint or metallic accents for added dimension. Seasonal updates can include swapping out colors to match your mood.
Start with a base coat in your lightest color. Mix your second color with a bit of water or glazing medium to create a translucent effect. Use a sponge or large brush to blend the two colors at the transition point, working quickly to keep the edges soft. Gradually feather the colors into each other, then let dry thoroughly. Add additional layers if needed to deepen the gradient. Finish with a protective sealant.
Add metallic or glitter touches along the fade line for extra shimmer. Incorporate textured paints or patterns within the gradient for visual interest. Personalize further by including subtle motifs or symbols that hold meaning for you. Pair with minimalistic furniture and textiles for a sleek, modern look.
A dip-dye wall elevates your decor with minimal effort but maximum impact. It’s a subtle statement that complements almost any style. Once you master blending techniques, you’ll feel empowered to experiment with more complex gradients and textures. Ready to fade into a more stylish space?
13. Pop Art-inspired Colorful Dots and Shapes

Want to inject personality and playfulness into your space? Pop art-inspired walls with colorful dots and shapes create a lively, youthful vibe that’s impossible to ignore. The challenge is avoiding a cluttered look while maintaining boldness, but with careful placement, you can achieve a fun yet sophisticated effect. If you love vibrant, whimsical decor, this is your style.
Think of clusters of bright circles in primary colors scattered across a wall, interspersed with quirky shapes like stars or lightning bolts. The composition feels energetic and spontaneous, like a piece of street art or comic strip. The colors pop vividly against neutral backgrounds, energizing the room and sparking creativity. It’s playful, bold, and full of character.
Choose a color palette that suits your mood—bright reds, blues, yellows, or a mix of pastels for a softer touch. Play with the size of the dots and shapes for visual interest—large and irregular for a dynamic look or smaller and uniform for a more ordered feel. Incorporate metallic or gloss paints for extra vibrancy. This style works well in kids’ rooms, creative spaces, or feature walls.
Start by lightly sketching your layout with a pencil, then use painter’s tape or stencils for precise shapes. Fill in each shape with bright, opaque paint, using small brushes for detail. Vary the sizes and placement to avoid a grid-like appearance. For added depth, layer different shades or add highlights and shadows. Once dry, seal with a clear topcoat to protect the design.
Add metallic or glitter accents within certain dots or shapes to create shimmer. Personalize with your initials or favorite motifs within the pattern. Incorporate contrasting textures or finishes for extra richness. Keep the surrounding decor minimal to let the wall stand out as a fun, energetic feature.
Colorful dots and shapes instantly uplift a space and reflect a joyful personality. They’re easy to customize and perfect for experimenting with color placement. Mastering this technique will boost your confidence to try even bolder ideas. Ready to make your wall pop?
14. Vibrant Color Wash Technique for a Textured Look
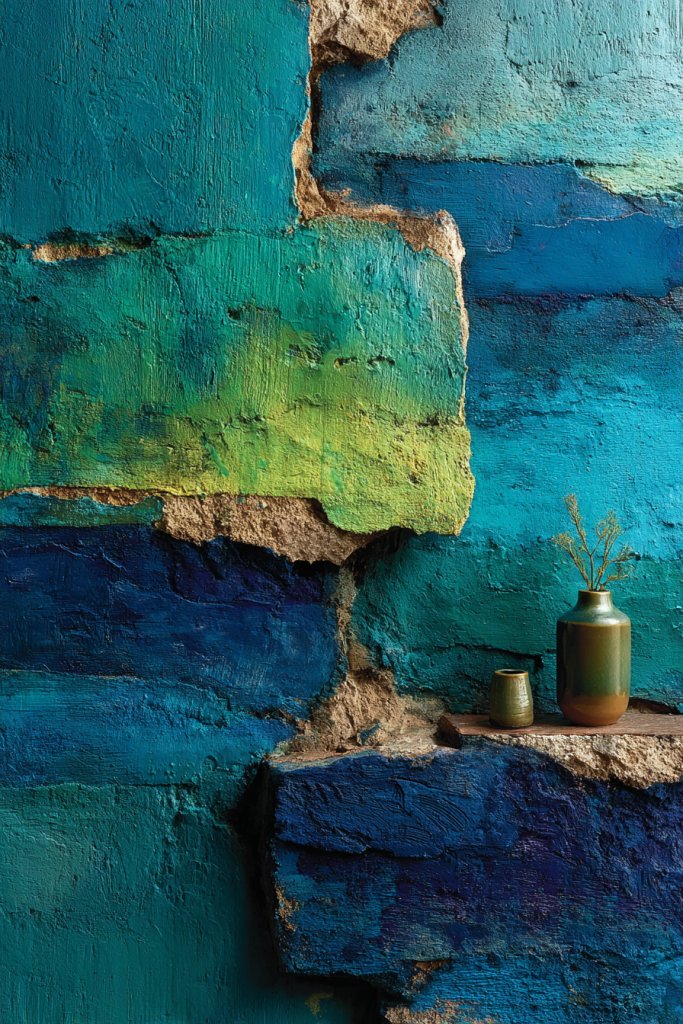
Looking for a way to add depth and energy to your walls without busy patterns? A vibrant color wash technique creates a textured, painterly effect that feels both lively and sophisticated. The challenge is achieving an even, yet layered look, but with patience, you can create a stunning textured backdrop. If you love subtle artistry, this idea will inspire you.
Visualize a wall covered in translucent layers of bright paint—orange blending into pink, or turquoise fading into green—creating a rich, multi-dimensional surface. The textured layers give the illusion of depth and movement, like a vibrant watercolor or oil painting. The colors seem to shimmer and shift under different lighting, adding complexity and life to your room.
Use a monochromatic palette with different shades for a subtle textured effect or mix multiple vibrant colors for boldness. Incorporate metallic or iridescent paints for extra shine. This technique works well in bedrooms, art studios, or feature walls where you want a lively yet refined aesthetic. Adjust the opacity and layering to match your style.
Start with a base coat of a neutral or light color. Mix your chosen vibrant colors with glazing medium or water to create translucent layers. Apply with a wide brush, sponge, or rag, working quickly to blend and build up color. Overlap and feather the edges for a seamless transition. Use a sponge or dry brush for additional texture. Seal with a clear matte or semi-gloss finish.
Add metallic or pearl glazes over the wash for shimmer. Incorporate subtle patterns or shapes within the layers for added interest. Personalize with your favorite color combinations or abstract motifs. Keep surrounding decor simple, letting the wall’s textured richness shine.
A vibrant color wash creates an energetic, artistic atmosphere that elevates your space. It’s a flexible technique that encourages experimentation. Once you master layering, you’ll feel inspired to explore more painterly effects. Ready to add textured vibrancy?
15. Tropical Sunset Mural with Warm Hues

Ever wanted to capture the magic of a sunset on your wall? A tropical sunset mural with warm hues transforms your space into a vibrant, relaxing oasis. The challenge is creating a seamless blend of colors that feels natural and immersive, but with some patience, you can achieve a breathtaking scene. If you love warm, inviting atmospheres, this mural is your dream.
Imagine a wall painted with gradients of oranges, pinks, purples, and reds, mimicking the sky during sunset. Silhouettes of palm trees or distant mountains can add depth and context, making the scene come alive. The colors radiate warmth and energy, evoking feelings of relaxation and tropical escape. It’s like having a window to paradise right in your home.
Customize your sunset with different color schemes—fiery reds and yellows for a bold look or softer pastel gradients for a calming effect. Incorporate elements like clouds, birds, or horizon lines for added realism. Seasonal updates can include changing the palette or adding glitter to mimic the shimmering sun. Suitable for bedrooms, living rooms, or even outdoor patios.
Start with a large wall and sketch the horizon line lightly. Use sponges or brushes to blend warm colors from top to bottom, working quickly for smooth transitions. Use masking tape or stencils for silhouettes of trees or birds. Layer colors gradually, allowing each to dry before adding new ones. Finish with a sealant to protect the mural from fading or damage.
Add metallic or pearl accents in the sky for shimmer. Incorporate textured paints or glitter for extra glow. Personalize with initials or symbols that evoke your favorite memories or dreams. Pair with tropical textiles or rattan furniture to amplify the ambiance.
A tropical sunset mural instantly energizes and relaxes simultaneously, creating a unique vibe. It’s a bold statement that showcases your artistic side. Mastering this technique encourages you to explore other landscape or scene murals. Ready to bring the tropics home?
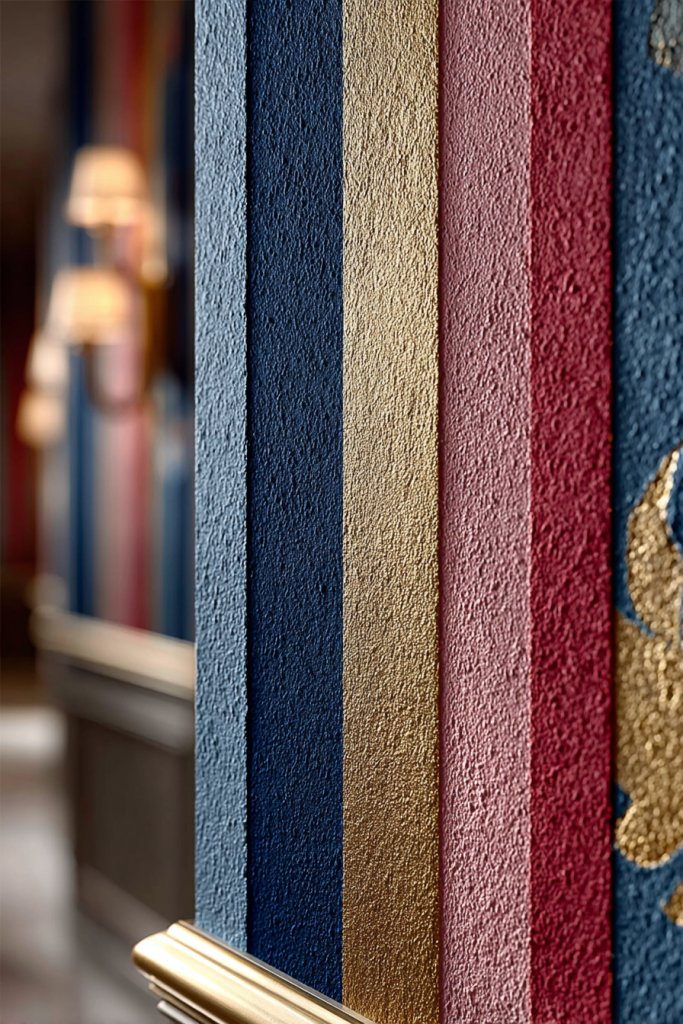
16. Bright Stripes with Metallic or Glitter Accents
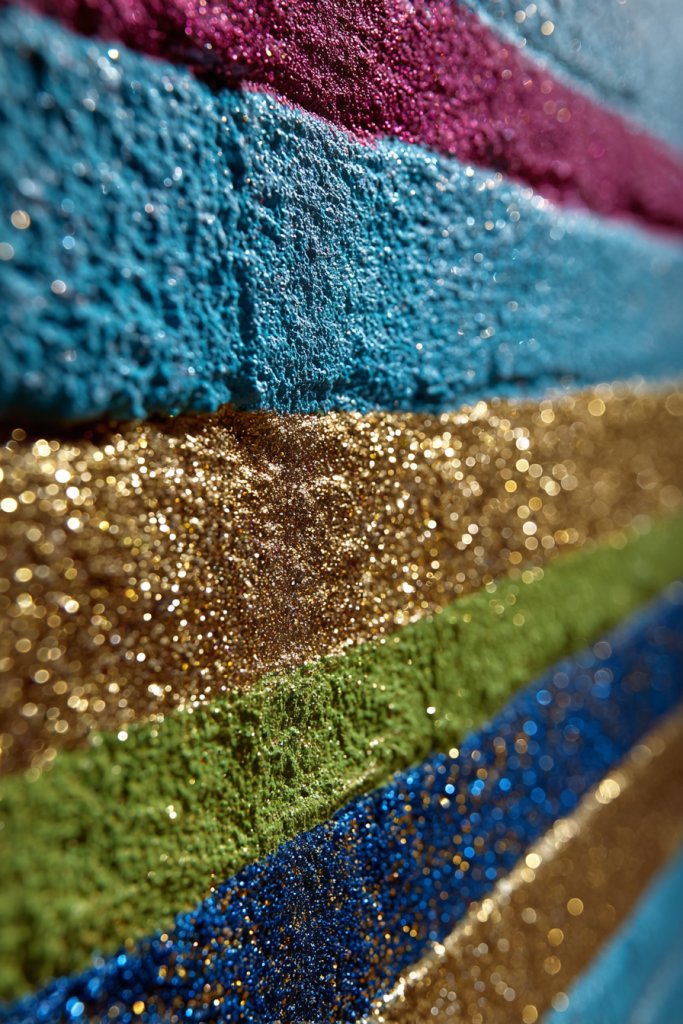
Want to add a touch of glamour and energy to your walls? Bright stripes combined with metallic or glitter accents create a lively, luxe look that catches the light and your eye. The trick is balancing shimmer with boldness to avoid an over-the-top feel. If you love a bit of sparkle with your stripes, this idea is perfect.
Visualize wide, bold stripes in vivid colors like fuchsia, turquoise, or yellow, accented with metallic or glitter borders. The shimmer catches the light as it moves, making your wall shimmer like a piece of jewelry. The pattern is playful yet elegant, adding movement and shine to your decor. It’s a celebration of color and light, perfect for making a statement.
Use metallic or glitter paints along the edges of plain or colorful stripes for a shimmering border. Mix matte, gloss, and metallic finishes for texture variation. Experiment with diagonal, vertical, or even irregular stripes for unique effects. Seasonal accents like gold for holidays or silver for winter can refresh the look.
Start by sketching your stripe pattern with a pencil, then tape carefully to ensure sharp edges. Fill in the stripes with vivid paint, then apply metallic or glitter accents along the borders or within stripes. Use a dry brush or sponge to add metallic highlights selectively. Seal with a clear varnish to lock in the shimmer and protect the surface from dust.
Layer different metallic shades or add glitter flecks within the stripes for extra sparkle. Incorporate other reflective elements like mirrored tiles or glass beads. Personalize with custom motifs or initials in metallic paint. Keep surrounding decor simple to maximize the shine.
Bright striped walls with metallic accents bring energy, glamour, and a modern edge to any room. They’re perfect for creative spaces or glamorous bedrooms. Once you master this look, you’ll feel confident adding metallic details to other projects. Ready to shimmer?
17. Abstract Line Art in Vibrant Colors

Craving a modern, minimalist aesthetic that still feels lively? Abstract line art in vibrant colors offers a sleek yet playful option to elevate your space. The challenge is creating a balanced design that feels intentional, not random. If you love clean lines with a pop of color, this idea is perfect for you.
Imagine continuous, flowing lines in bold hues like electric blue or fiery red, weaving across a neutral wall. The lines can form abstract shapes, faces, or geometric patterns that evoke movement and emotion. The simplicity of line art combined with vibrant colors makes your wall a striking yet sophisticated focal point. It’s like a modern sculpture frozen in time.
Choose a monochrome palette with one or two bold accent colors or go multi-colored for a more playful vibe. Keep the lines thin and delicate for a subtle look or thick and bold for maximum impact. This style pairs well with contemporary, Scandinavian, or eclectic decor. You can also incorporate metallic or glow-in-the-dark paints for extra flair.
Start by sketching your design lightly with pencil or using a projector for accuracy. Use smooth, high-quality paint pens or brushes to create continuous, fluid lines. Work slowly and intentionally to maintain clean strokes. For more complex designs, consider masking certain areas or using stencils. Seal with a clear matte or gloss finish for durability.
Add metallic or glow-in-the-dark accents to certain lines for extra interest. Personalize by integrating shapes or motifs that mean something special to you. Keep the surrounding decor minimal to highlight the artwork. This approach encourages a creative, confident artistic expression.
Abstract line art in vibrant colors is a chic, versatile way to modernize your space. It’s easy to update or expand over time, making it a flexible choice. Mastering this style boosts your confidence in minimalist artwork and encourages further creative projects. Ready to draw in style?
18. Colorful Stenciled Tiles for a Mediterranean Vibe
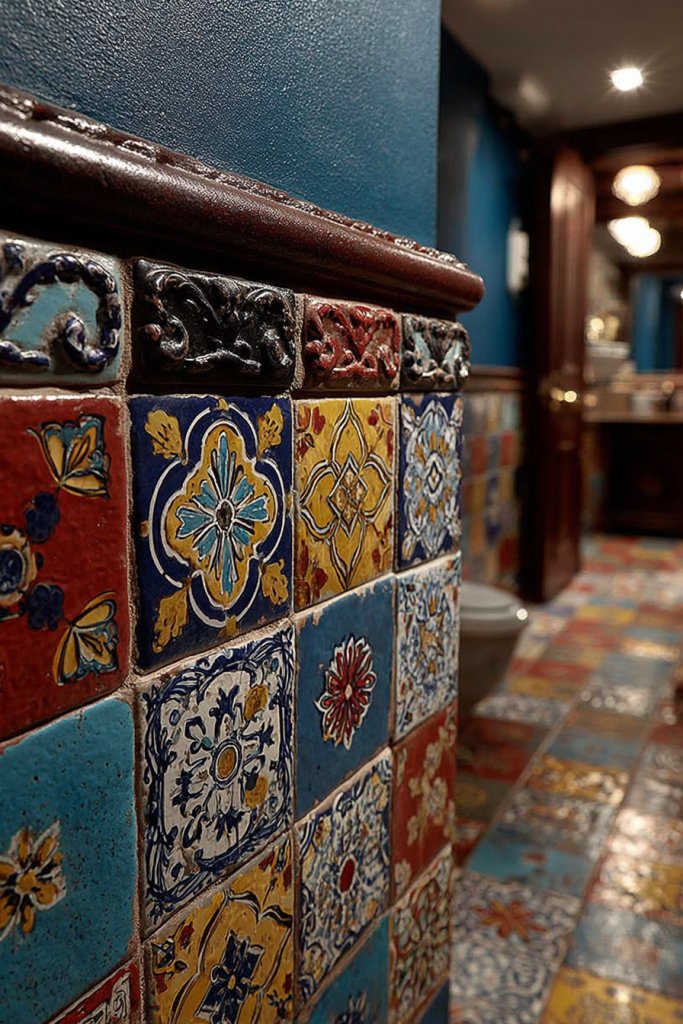
Want the charm of Mediterranean tiles without the hefty price tag? Stenciled tile patterns in vibrant colors can mimic that classic look with a DIY twist. The challenge is creating authentic-looking designs that last, but with patience, you can achieve a stunning, tile-inspired wall. If you love bold patterns and lively hues, this technique is your answer.
Picture a wall with intricate, repeating motifs in shades of cobalt blue, terracotta, and sunny yellow. The pattern resembles traditional ceramic tiles, giving your space a warm, inviting feel. The vivid colors and detailed designs evoke a sunny Mediterranean courtyard or seaside villa. It’s a lively, textured backdrop full of personality.
Choose from classic motifs like floral, geometric, or arabesque patterns. Use painter’s tape or stencils to maintain precision. Adjust the color palette to match your decor—bright and cheerful or muted and sophisticated. Seasonal options include adding metallic or glitter accents for special occasions.
Start by sketching your pattern lightly with pencil or using a projector. Use stencils and high-quality paint, applying with small brushes or sponges for detail. Work systematically to cover the wall in sections, ensuring consistency. Layer colors for depth, and seal with a clear varnish for protection. Consider adding textured paint or faux grout lines for realism.
Incorporate metallic or gloss paints for a richer effect. Personalize by adding your initials or motifs within the pattern. Mix and match different tile patterns for a patchwork look. Pair with wrought iron or wood furniture to complete the Mediterranean vibe.
Stenciled tile walls combine style and DIY spirit, creating a warm, inviting atmosphere. They’re budget-friendly and customizable, making them perfect for personal expression. Once you master this technique, you’ll feel inspired to explore other tile or pattern projects. Ready to bring the Mediterranean home?
19. Rainbow Spiral or Circular Patterns for Dynamic Movement

Looking to inject energy and movement into a dull wall? Rainbow spirals or circles create a sense of motion that energizes any room. The idea sounds complex, but with simple tools, you can craft a dynamic focal point. If you love vibrant, playful decor that captures attention, this is your project.
Visualize a large swirling rainbow circle centered on your wall, with each ring in a different bright hue. Alternatively, a series of concentric circles in rainbow colors radiate outward, creating a hypnotic, energetic effect. The pattern’s movement guides your eye around the room, adding a lively rhythm. It feels vibrant and alive—like a visual dance.
Use bright, saturated colors for maximum impact or softer pastel hues for a more subdued look. Incorporate metallic or gloss finishes to enhance the shimmer and depth. Vary the size of the circles or spirals based on your wall size—large for impact, small for subtlety. It suits modern, eclectic, or even bohemian styles.
Start with a central point and sketch concentric circles or spirals lightly with a pencil. Use painter’s tape or stencils for clean edges, then fill in with vivid, opaque paints. Work from the center outward, layering colors for vibrancy. For a more fluid look, freehand the shapes with a steady hand. Seal with a clear gloss to protect your design.
Add metallic or glitter accents to certain rings or spirals for extra shimmer. Personalize with small motifs or initials within the pattern. Incorporate additional elements like starbursts or rays for more visual complexity. Keep surroundings simple to let the pattern shine.
Rainbow spirals and circles bring fun, movement, and color to any space, making your room lively and inviting. They’re a bold statement of creativity and can be scaled to fit any room size. Mastering this design will inspire confidence in your ability to create energetic art. Ready to swirl?
20. Multi-Colored Dot Gradients (Pointillism Effect)
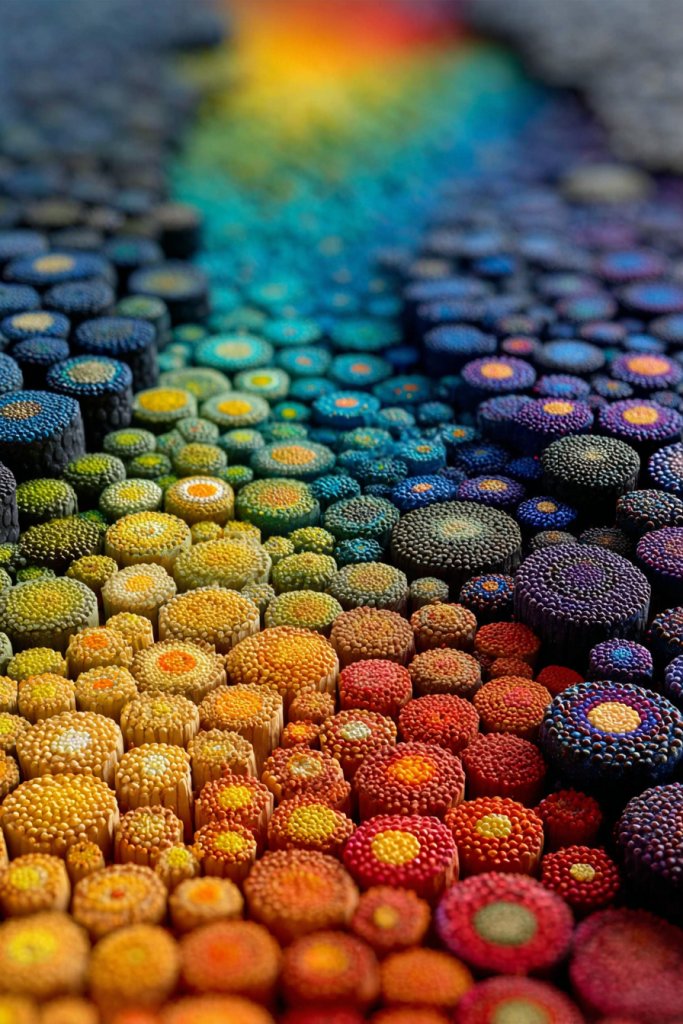
Want a textured, vibrant wall that’s full of depth? Multi-colored dot gradients mimic the pointillist art style, creating a mesmerizing, textured effect. The challenge is placing the dots evenly while maintaining a smooth gradient, but with patience, you can craft a stunning visual masterpiece. If you love detailed, colorful decor, this idea is perfect.
Imagine tiny dots in shades of blue, pink, yellow, and green gradually transitioning from one color to another, forming a seamless gradient. The pattern feels lively and tactile, with each dot contributing to the overall flow. The effect resembles a vibrant, painstakingly painted artwork that invites close inspection and admiration. It’s playful and artistic, perfect for creative spaces.
Adjust the size and density of the dots to create different textures—smaller, closer dots for a more detailed look, larger, sparser ones for a bold effect. Use contrasting colors for more vibrancy or analogous shades for harmony. Incorporate metallic or glow-in-the-dark paints for extra dimension. Suitable for feature walls in bedrooms, studios, or kids’ rooms.
Begin by sketching a faint outline of your gradient on the wall. Use small brushes or foam applicators to dot the paint carefully, working from one side to the other. Vary the color placement gradually to achieve a smooth transition. Layer additional dots to deepen the gradient, and be patient—the process can take time but yields a mesmerizing result. Finish with a protective clear coat.
Incorporate metallic or glitter dots within the gradient for shimmer. Personalize with initials or symbols within the pattern. Use different dot sizes or introduce subtle patterns for extra interest. Pair with minimalist furniture to keep the focus on your art.
Pointillist-style walls are a testament to patience and artistry, creating a textured, colorful canvas. They turn a simple wall into an engaging visual experience. Mastering this technique boosts confidence in detailed, meticulous work and inspires further creative projects. Ready to dot your way to a stunning wall?
21. Bright Faux Brick Wall with Colorful Paint Technique

Craving an industrial-chic vibe without the hassle of real bricks? Bright faux brick walls painted with colorful techniques offer a bold, textured alternative that’s surprisingly simple. The challenge is creating realistic-looking bricks with vibrant hues, but with patience and technique, you can craft a statement wall that’s full of personality. If you love urban style with a twist, this is your project.
Picture a wall painted to mimic bricks with a lively palette—reds, blues, yellows, or even multicolored bricks in a rainbow pattern. The textured appearance is achieved through painting and sponging, giving depth and dimension. The colorful bricks create a playful, energetic backdrop that contrasts beautifully with sleek, modern furniture. It’s like a street art mural turned interior feature.
Use different shades within each ‘brick’ for a more realistic, varied look or keep them uniform for a bold, graphic style. Incorporate metallic or gloss paints to add shimmer or depth. The pattern can be arranged in traditional horizontal rows or staggered for authenticity. Seasonal or thematic updates could involve changing colors to match holidays or moods.
Start by sketching a brick pattern with a ruler and pencil, then outline with painter’s tape. Use sponges or stippling brushes to apply a base color, then add shading and highlights to mimic depth. Use a small brush to add mortar lines in a contrasting neutral or bright hue. Layer colors and textures for realism, then seal with a matte or semi-gloss finish. Refresh the look periodically.
Add metallic or iridescent highlights to certain bricks for shimmer. Personalize by including symbols, initials, or small motifs within the bricks. Play with different color combinations for a unique, vibrant appearance. Keep surrounding decor simple to let the brick wall be the star.
Faux brick walls in bright colors turn ordinary interiors into eye-catching, artistic spaces. They’re a creative way to incorporate texture and color without heavy construction. Mastering this style will empower you to explore other faux finishes and textured techniques. Ready to brick up your creativity?
Conclusion
Exploring these vibrant wall painting ideas opens up endless possibilities to personalize and enliven your home. Whether you opt for a striking mural or subtle accents, each idea is a chance to showcase your creativity. Don’t hesitate—pick your favorite design and start transforming your space today into a lively, inspiring environment!